As much as old walk-up apartments can offer better living space and a more flexible layout to play around with, it’s certainly not for everyone as they often require a major renovation job. This can range from having to overhaul the electrical wiring, or finding out that you have significant waterproofing issues.
For Michelle (*not her real name for privacy reasons) and her partner, they had their work cut out for them with their purchase of a walk-up apartment that was built in the 1960s. In their case, they only found out about a potential asbestos issue later on (houses built before 1991 will need to go through an asbestos survey).
But ultimately, they decided to pick this place because they found the surroundings charming. “We saw lots of potential in the space to design a home for the things we love,” she added.
What they wanted to achieve was a mix of Australian and Danish home designs. In a nutshell, combining these two styles meant a bright and airy space with pops of colour.
There are currently three of them staying at her place, Michelle, her partner, and their newly adopted fur kid, Ari.
Let’s join her as she shares her journey and the rewards she got for combining these two design styles together in their walk-up home.
How The Renovation Journey Turned Out
Their initial budget for the reno was $120,000, but they ended up having to increase it later due to additional work they had to add on. As we mentioned in the introduction, this is definitely the risks with older apartments. Thankfully, the couple was well prepared for this as she said, “this is quite inevitable as it’s an old apartment.”
The couple generally likes Australian and Danish designs, especially for their clean lines and muted tones. They also love fun colours.
For the uninitiated, an Australian home typically reflects a laidback ambience while also bringing together the country’s love for the outdoors. It’s not unusual to see some of the dominant colours in the Australian outback, such as greys and whites and shades of blue reminiscent of the sea.
And of course, who doesn’t want to incorporate a bit of Danish interior design styles to their home? After all, they are well known for being the kings of “hygge”, and if you’ve always wanted to have a cosy atmosphere at home, there can be no better inspiration.
“We tried to have a mix of both by choosing whites and greys as our base colours, and inserted additional colours with soft furnishing.” This approach allowed them to change things out as and when they felt like they wanted to update their space.
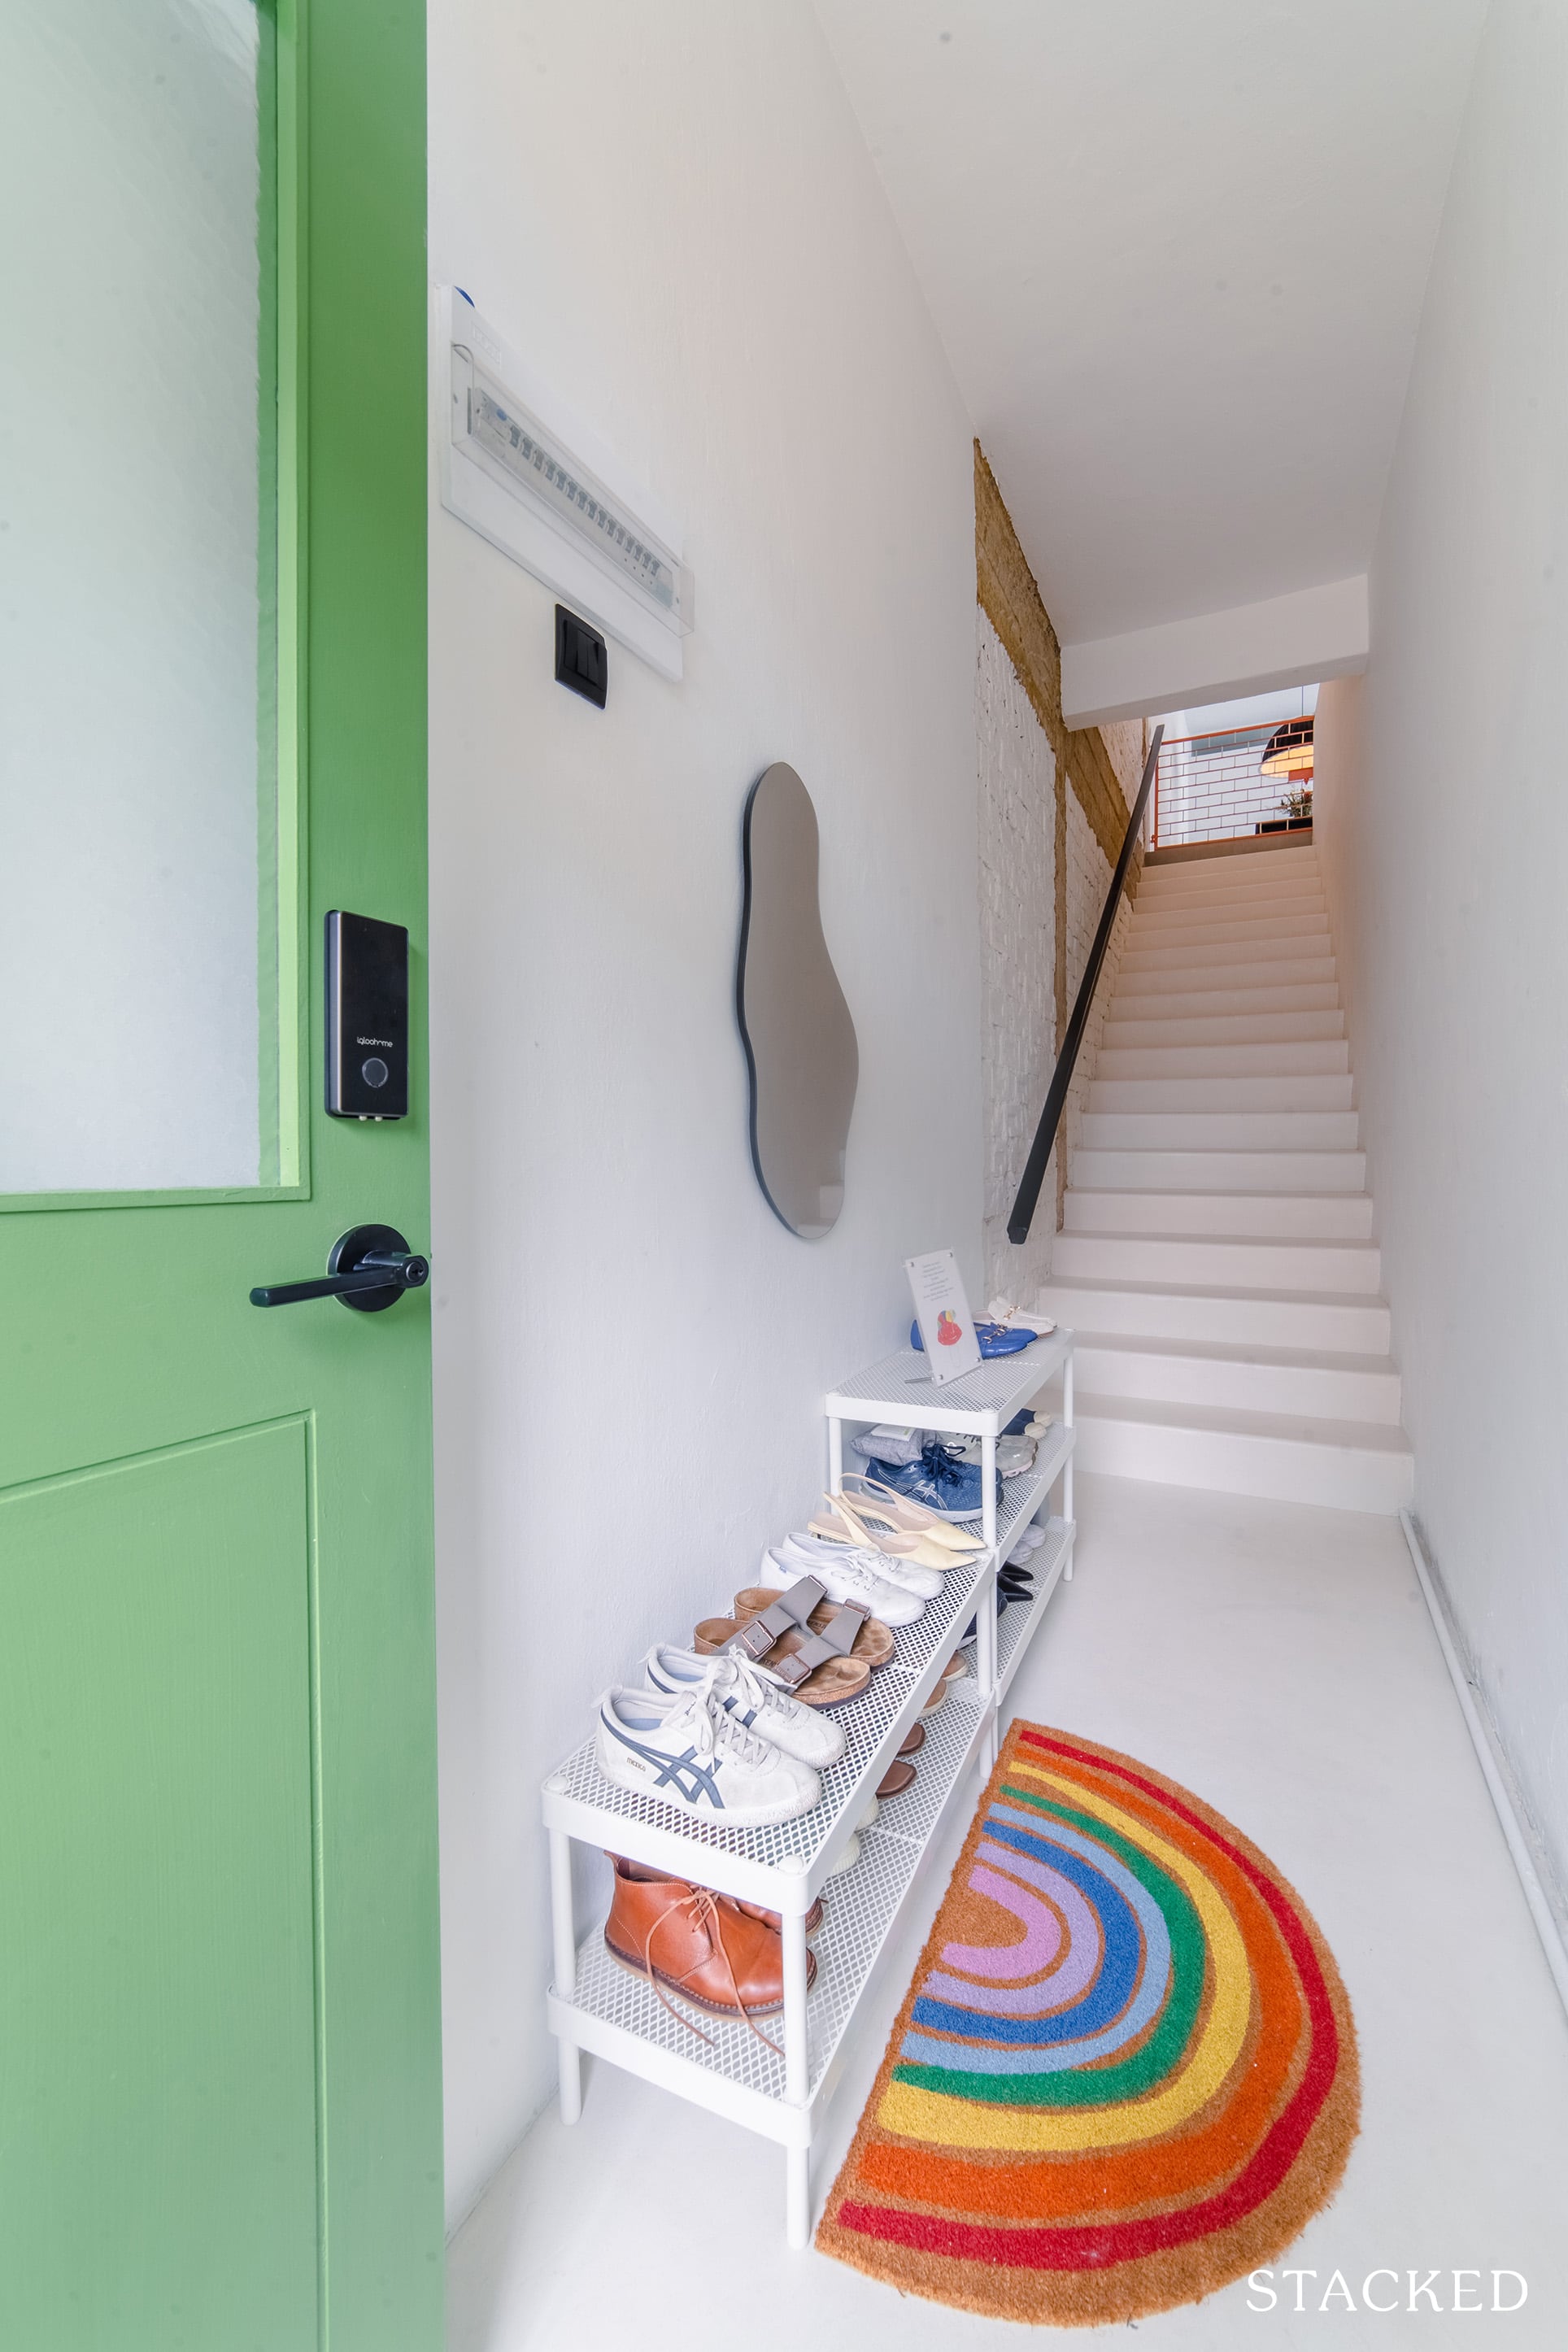
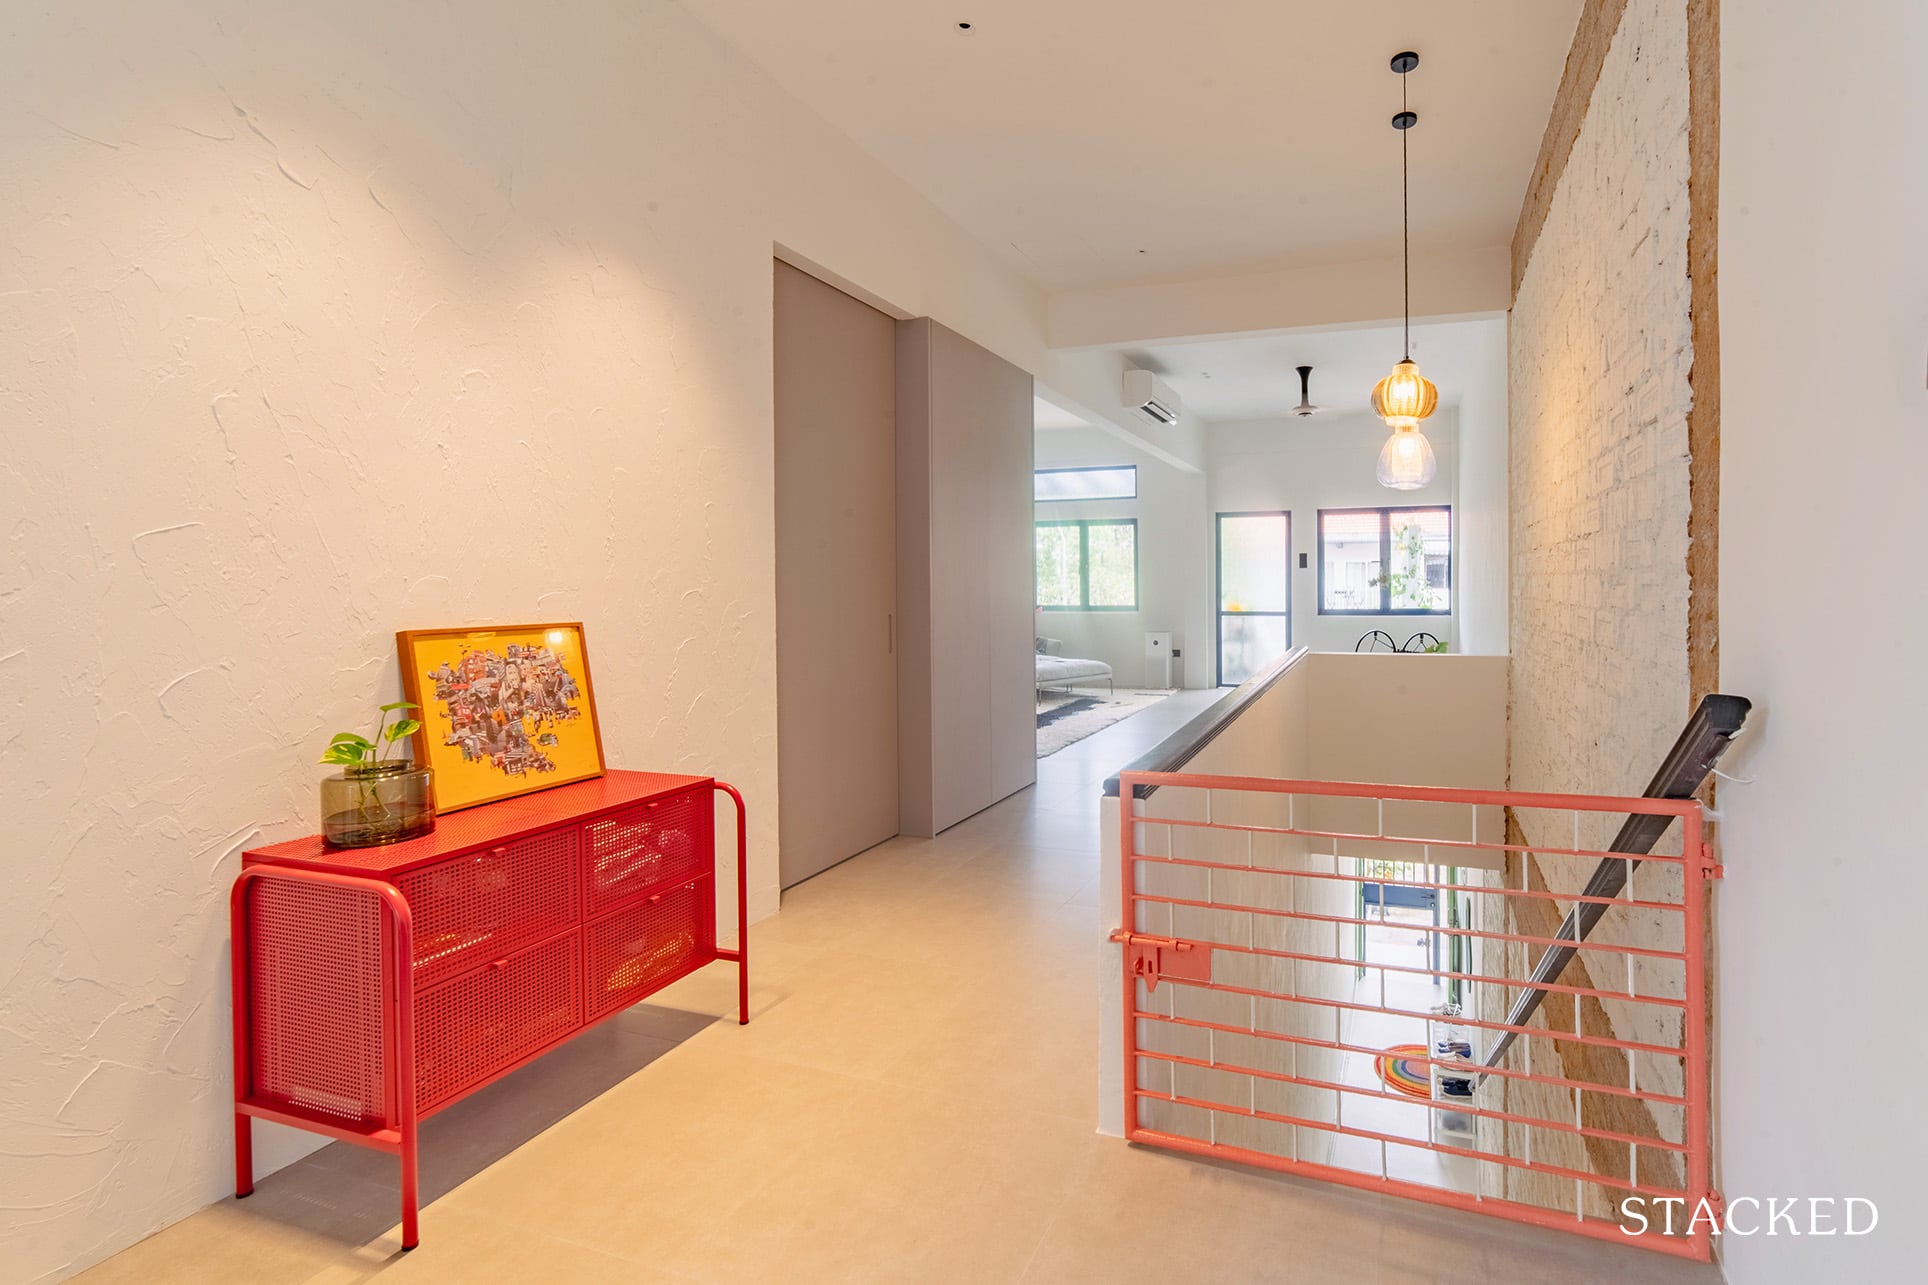
They were also keen on retaining some original elements of the house that had a very old-school charm. “We kept the original grilles at the front and back balconies, as well as the little swing gate that prevents our cat from running down the stairs.”
Michelle said that their designer incorporated all their requests into the base design. They also challenged themselves to only buy items that they really love, furnishing their home as stylishly and as cheaply as possible. “We trawled Carousell for months and managed to find furniture that we really liked,” she said.
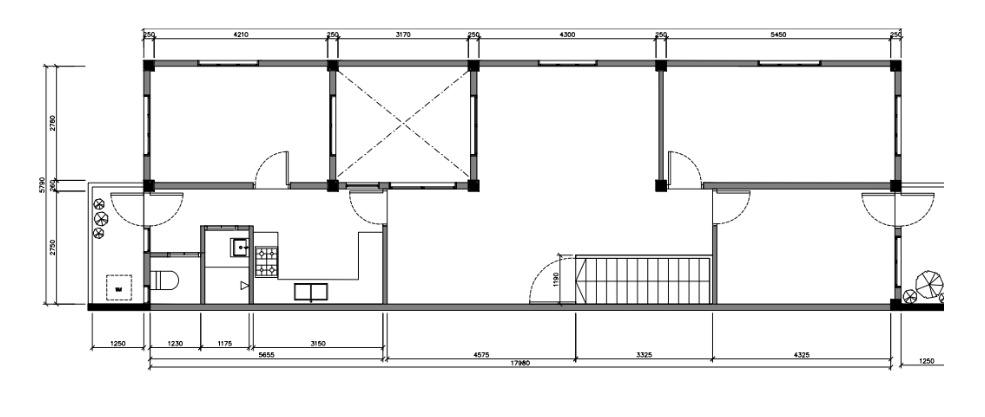
To achieve the home design that they want, the couple had to change the original home layout, which is paramount to opening up the space for better airflow and light.
Here are the before and after floor plans so you can clearly see what layout changes took place:
Before:
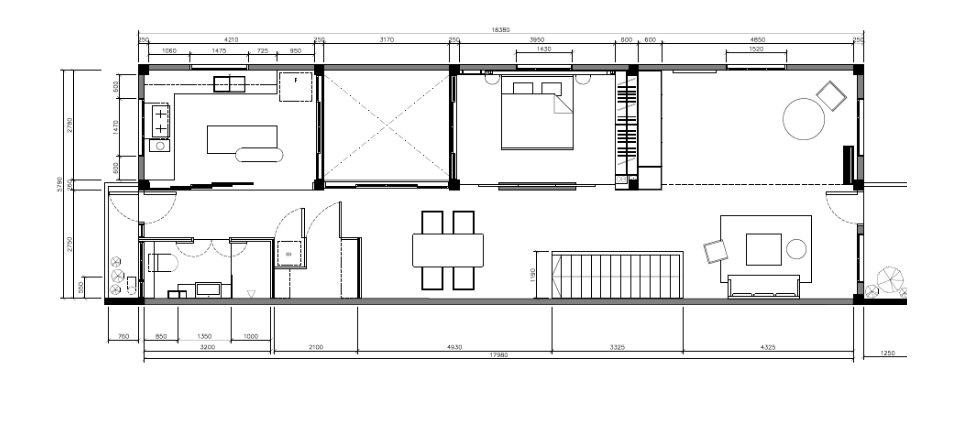
After:
Now let’s have a visual tour of their place and see how their home turned out:
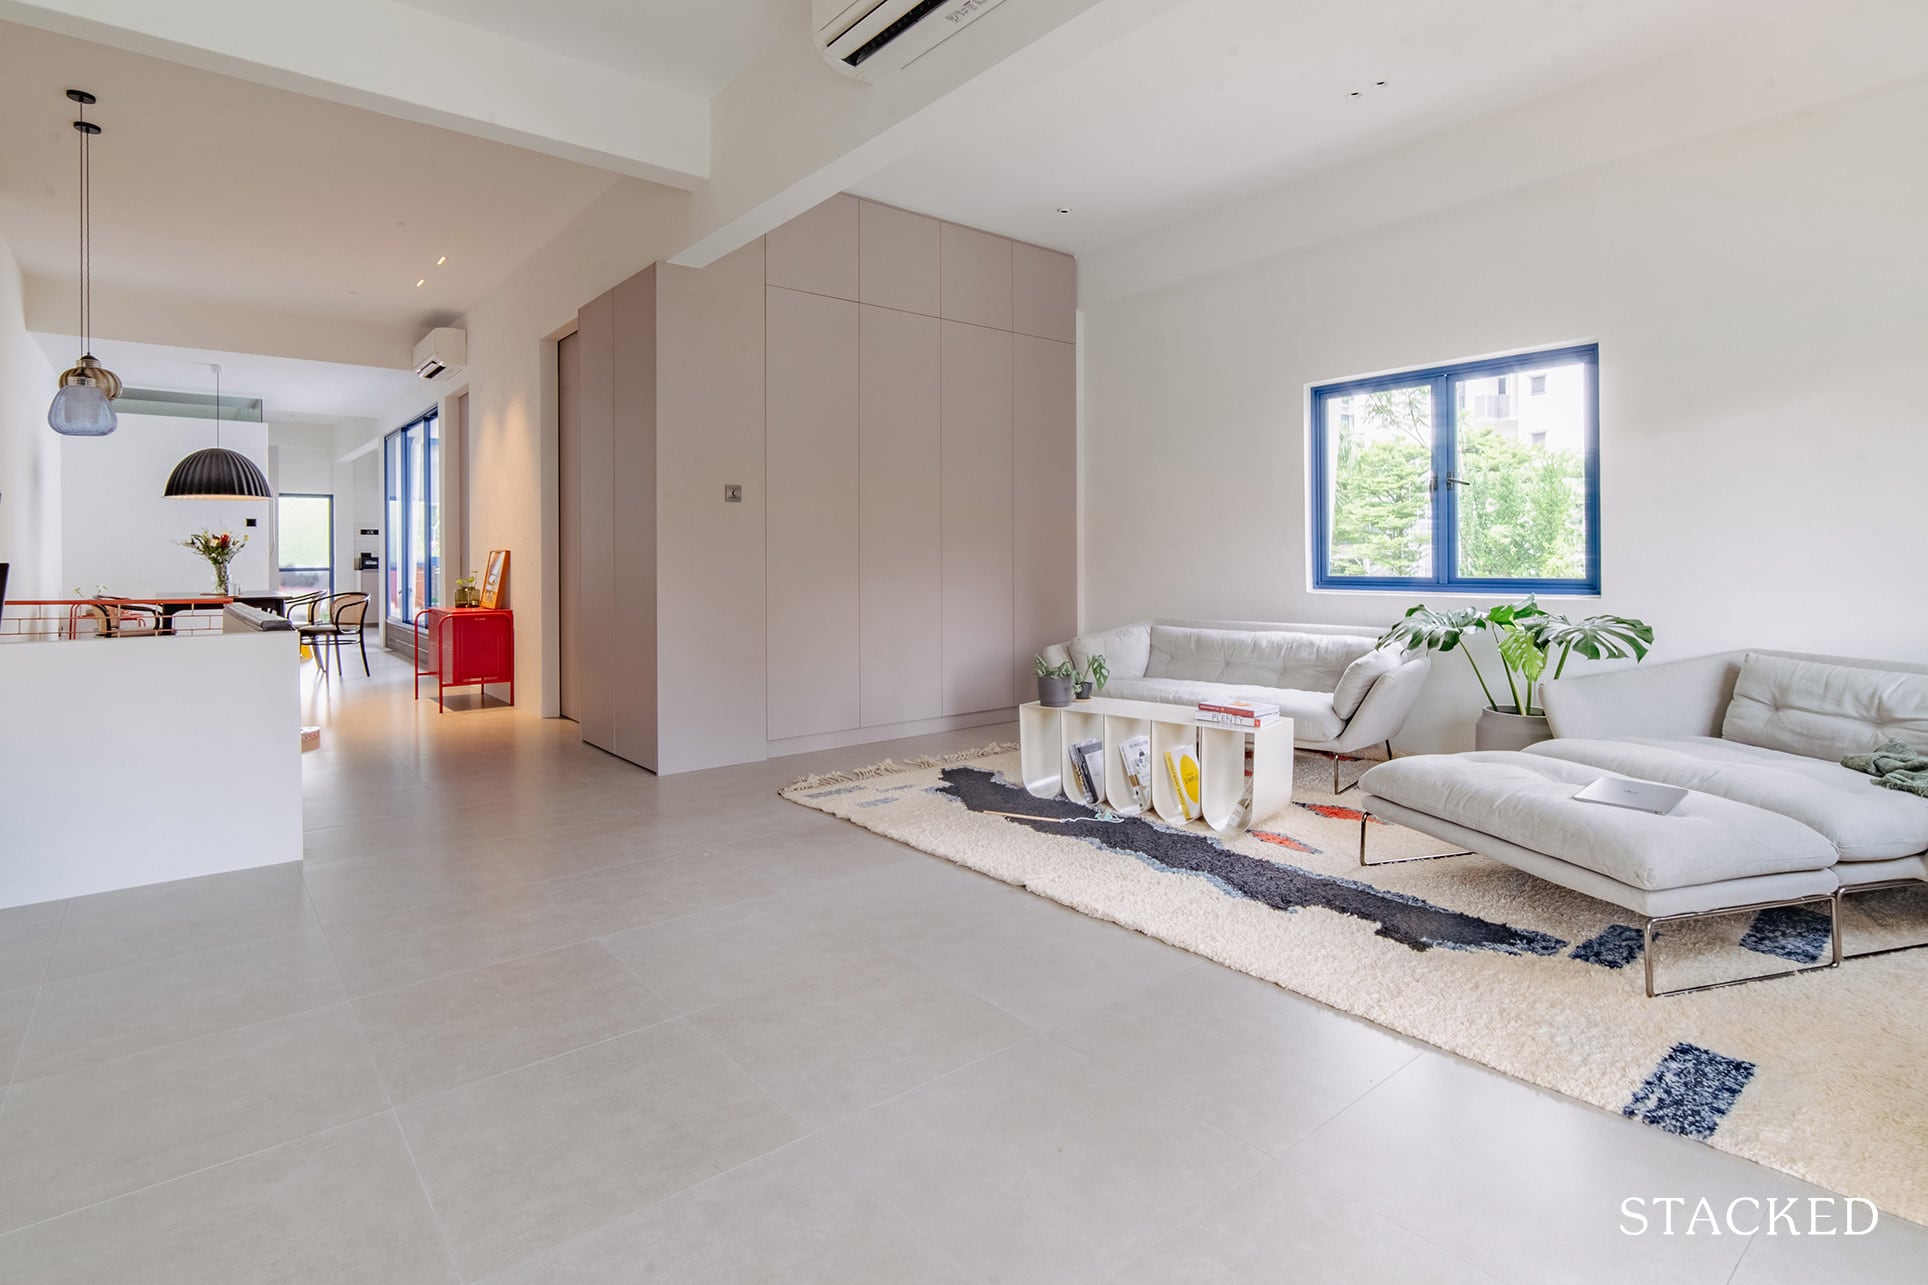
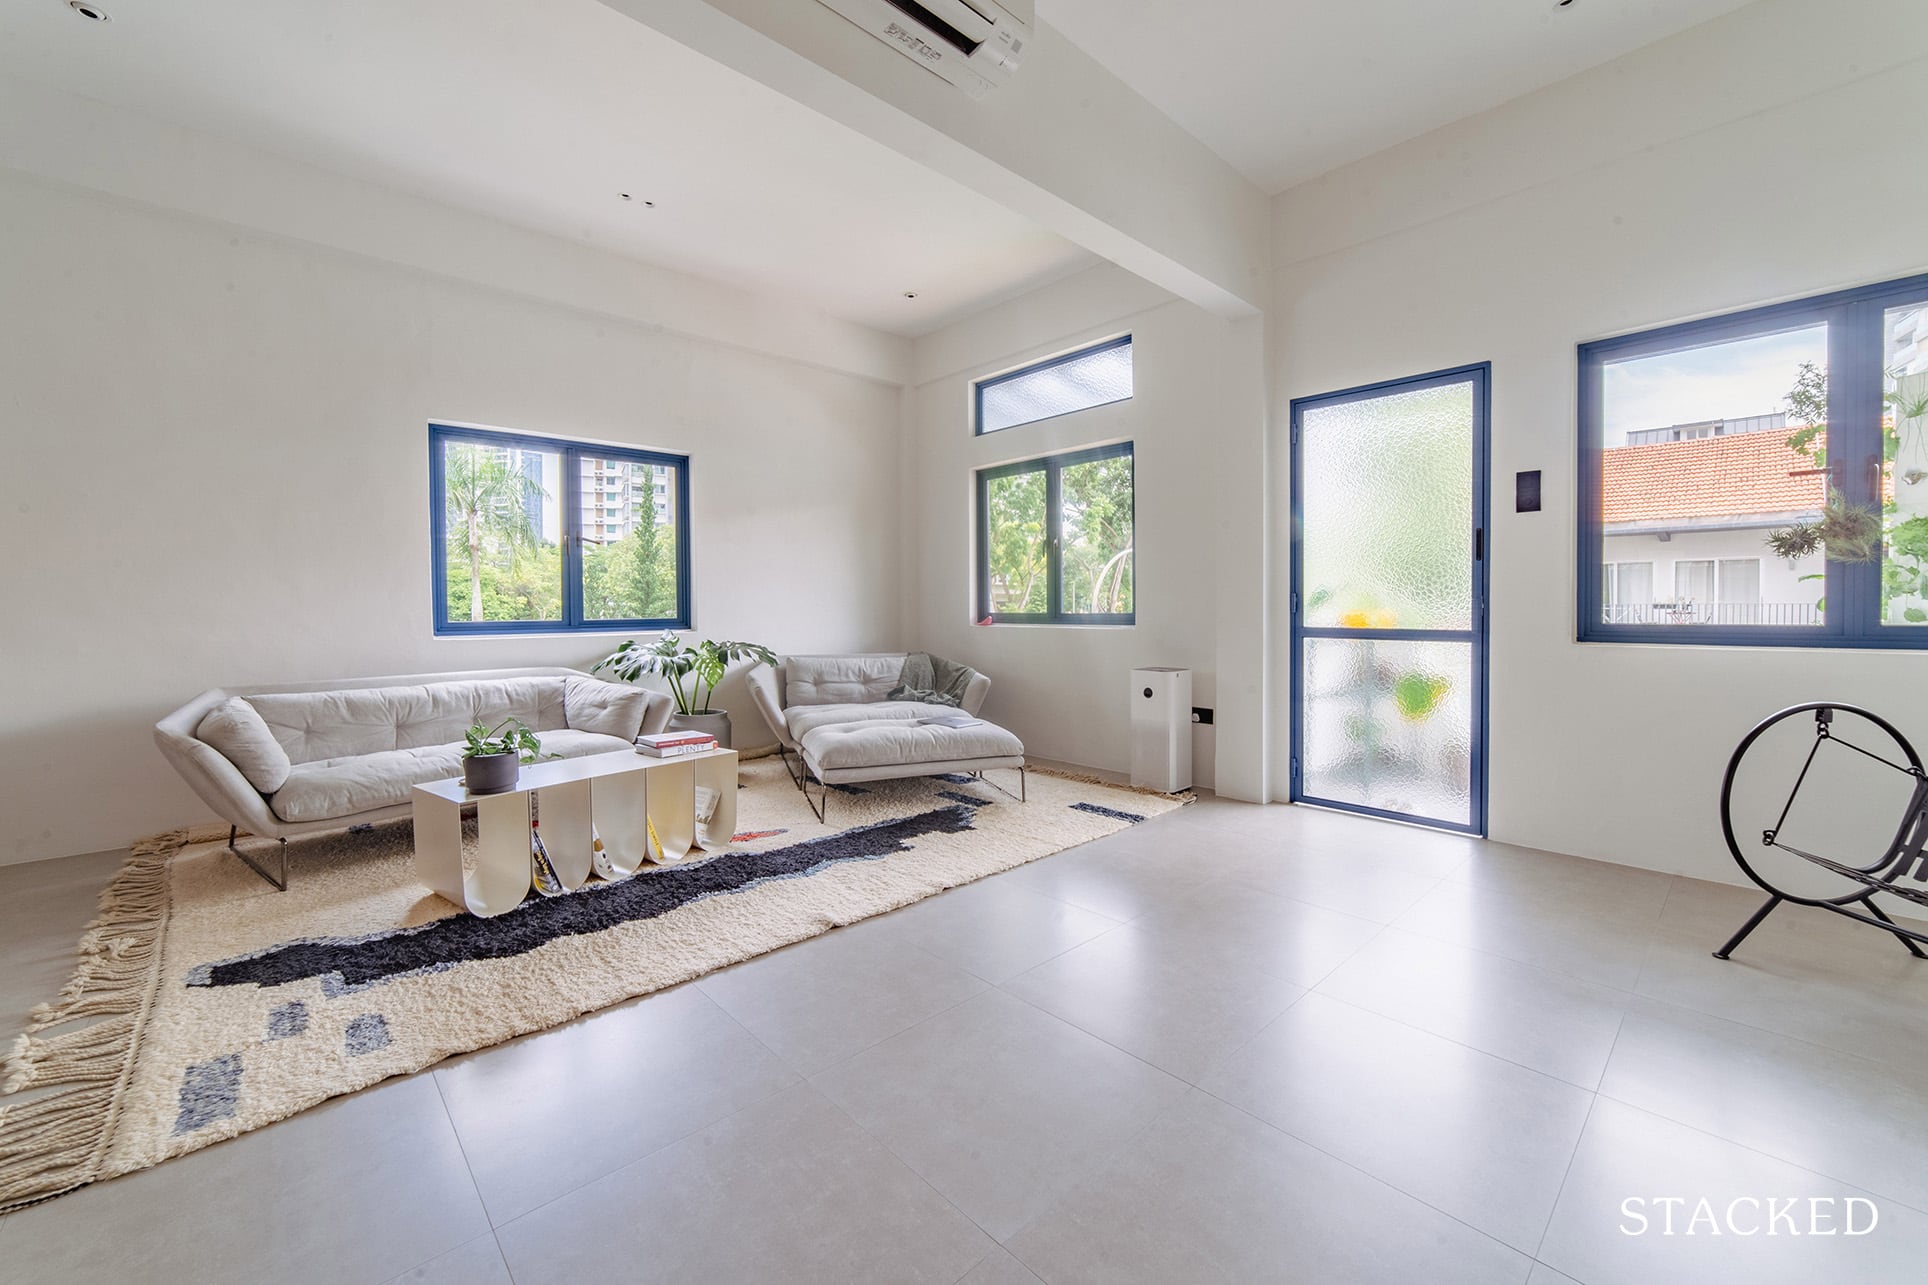
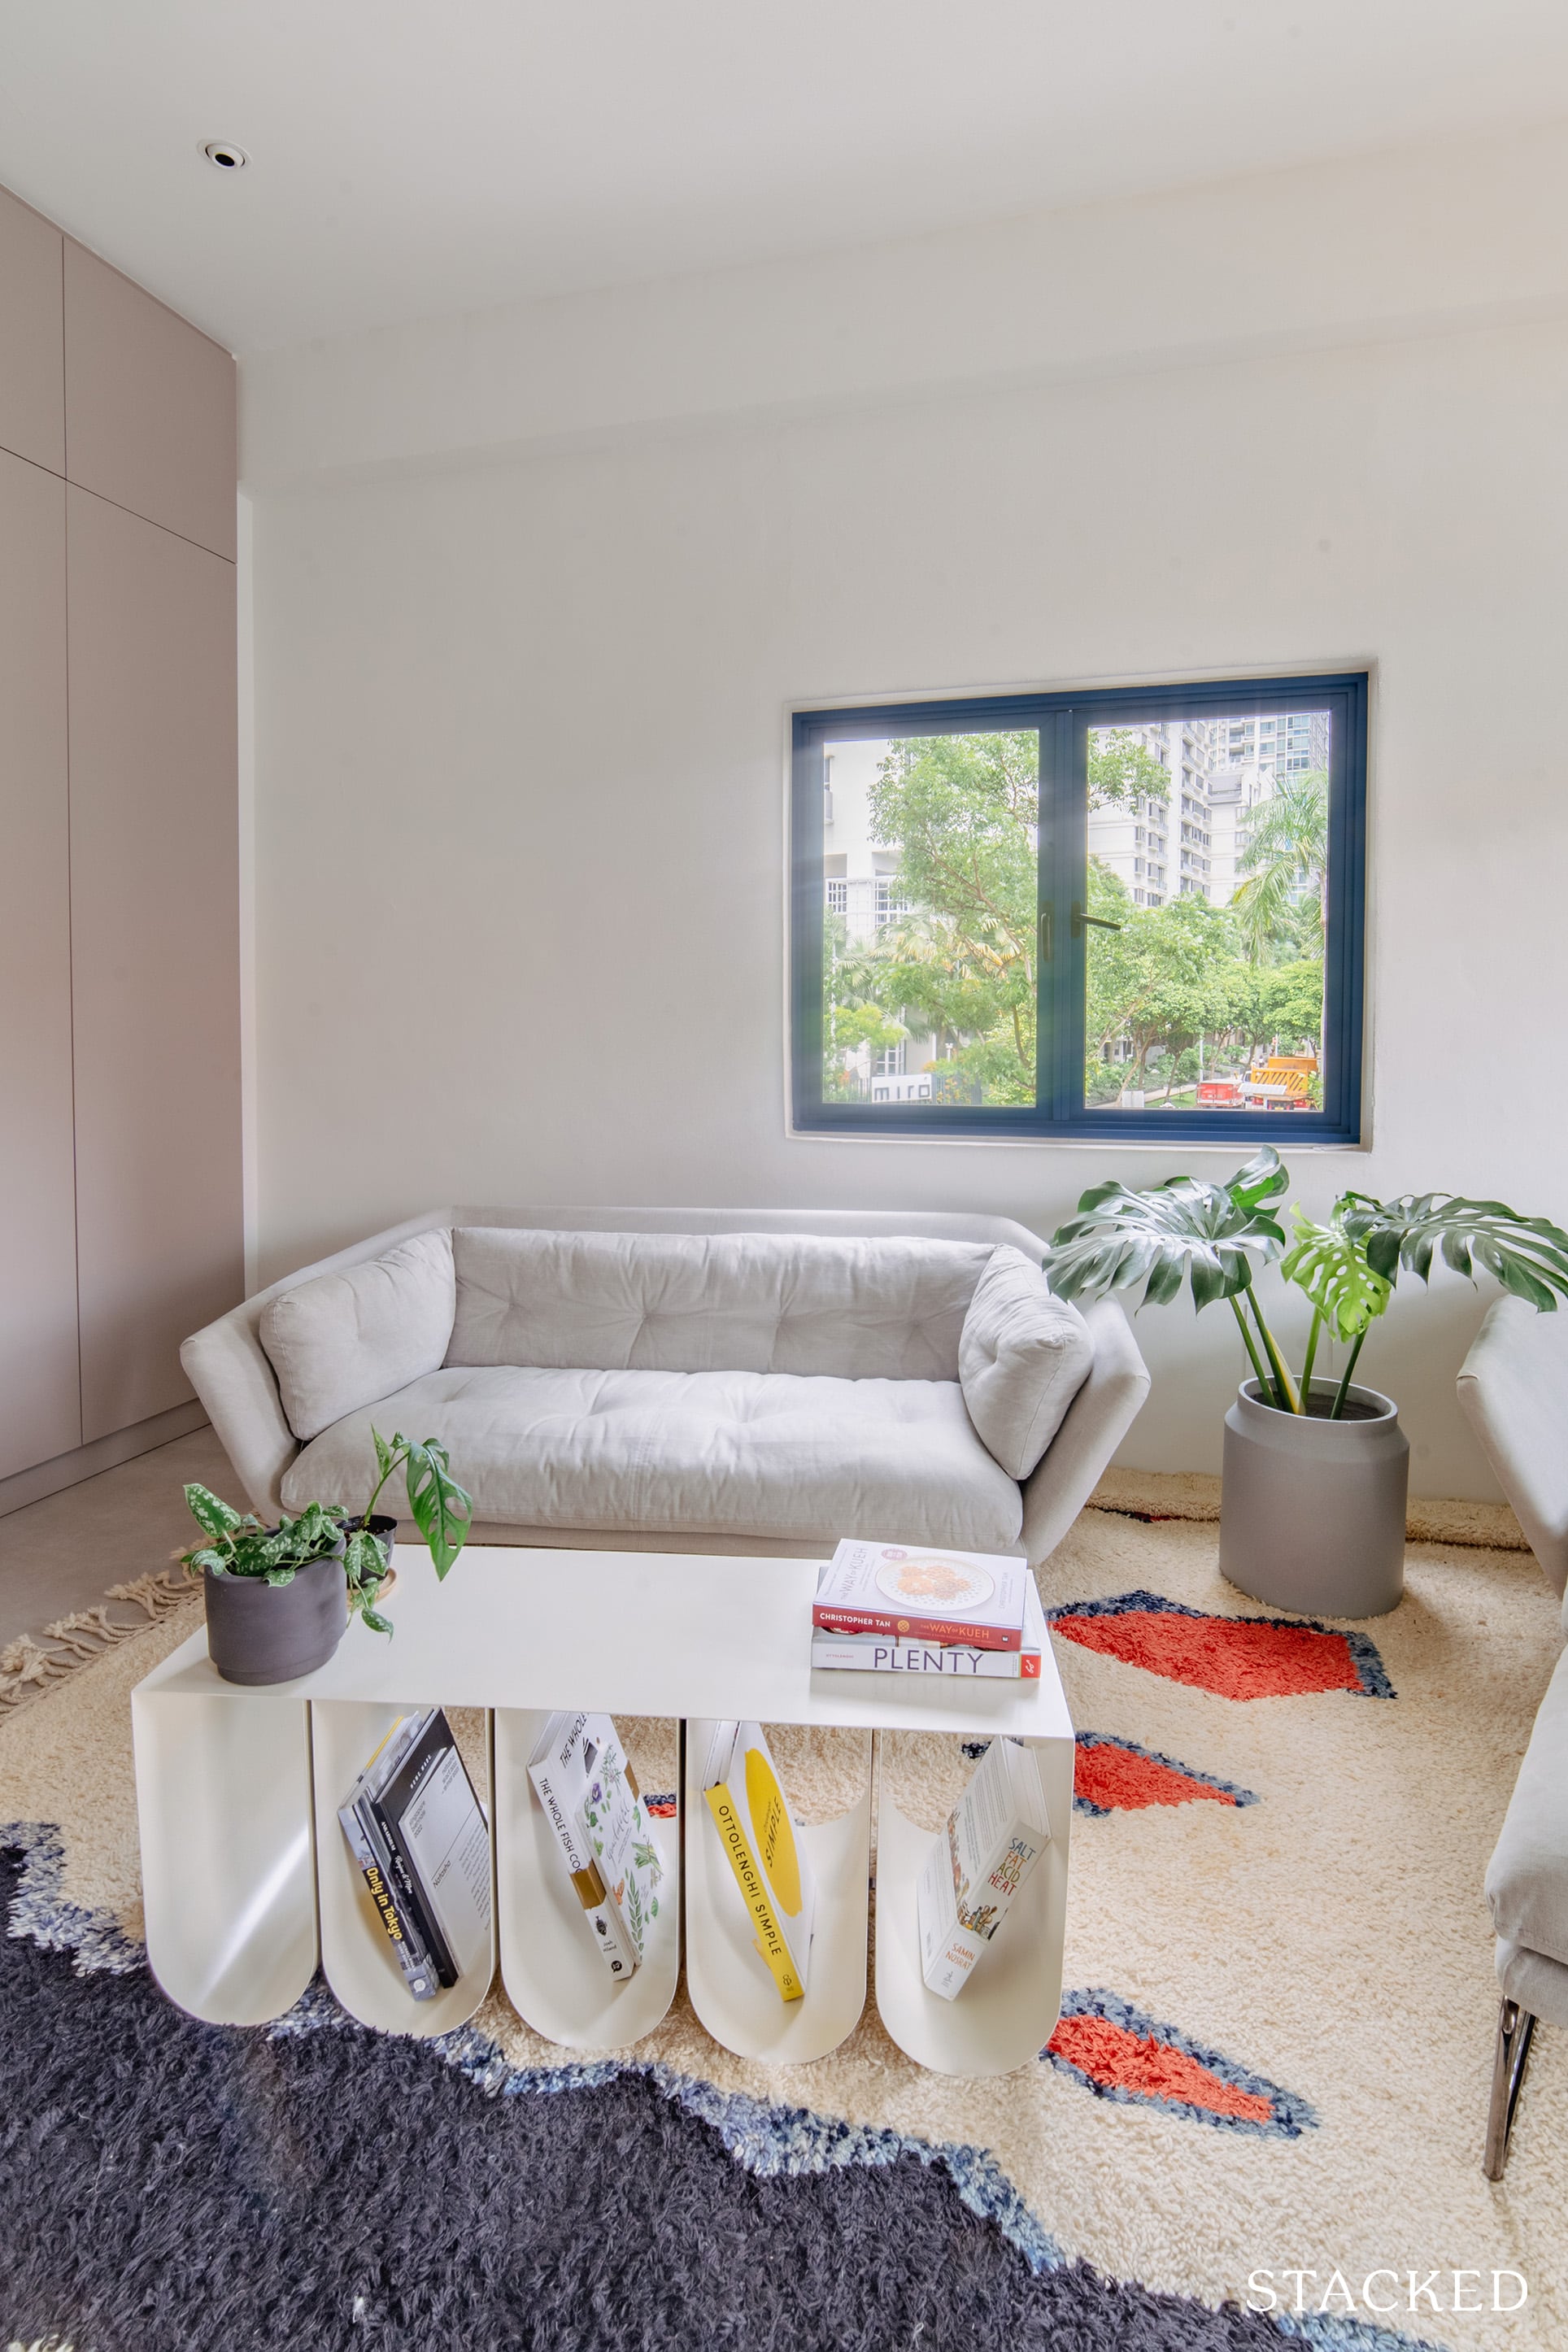
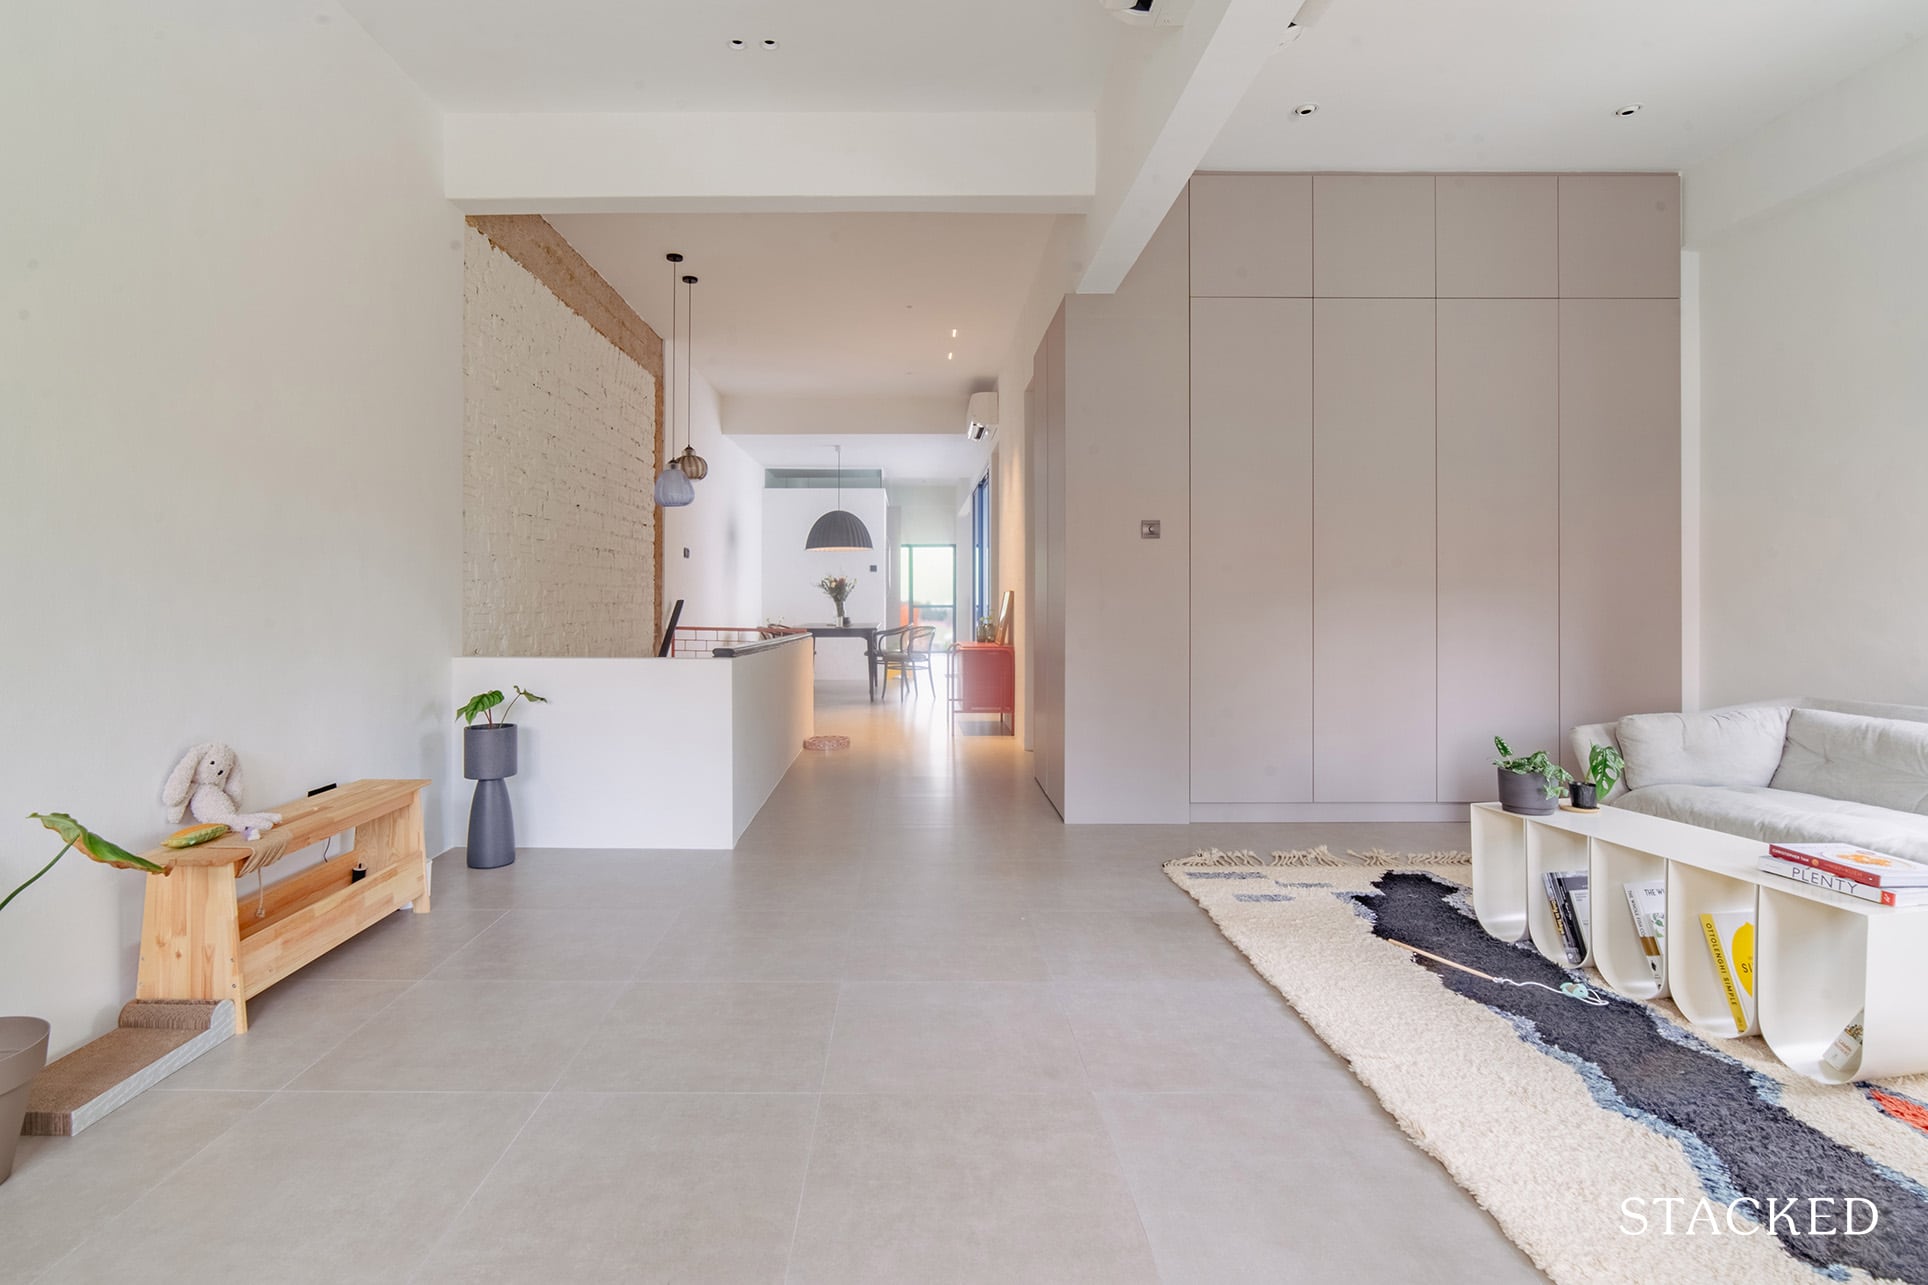
Living Room
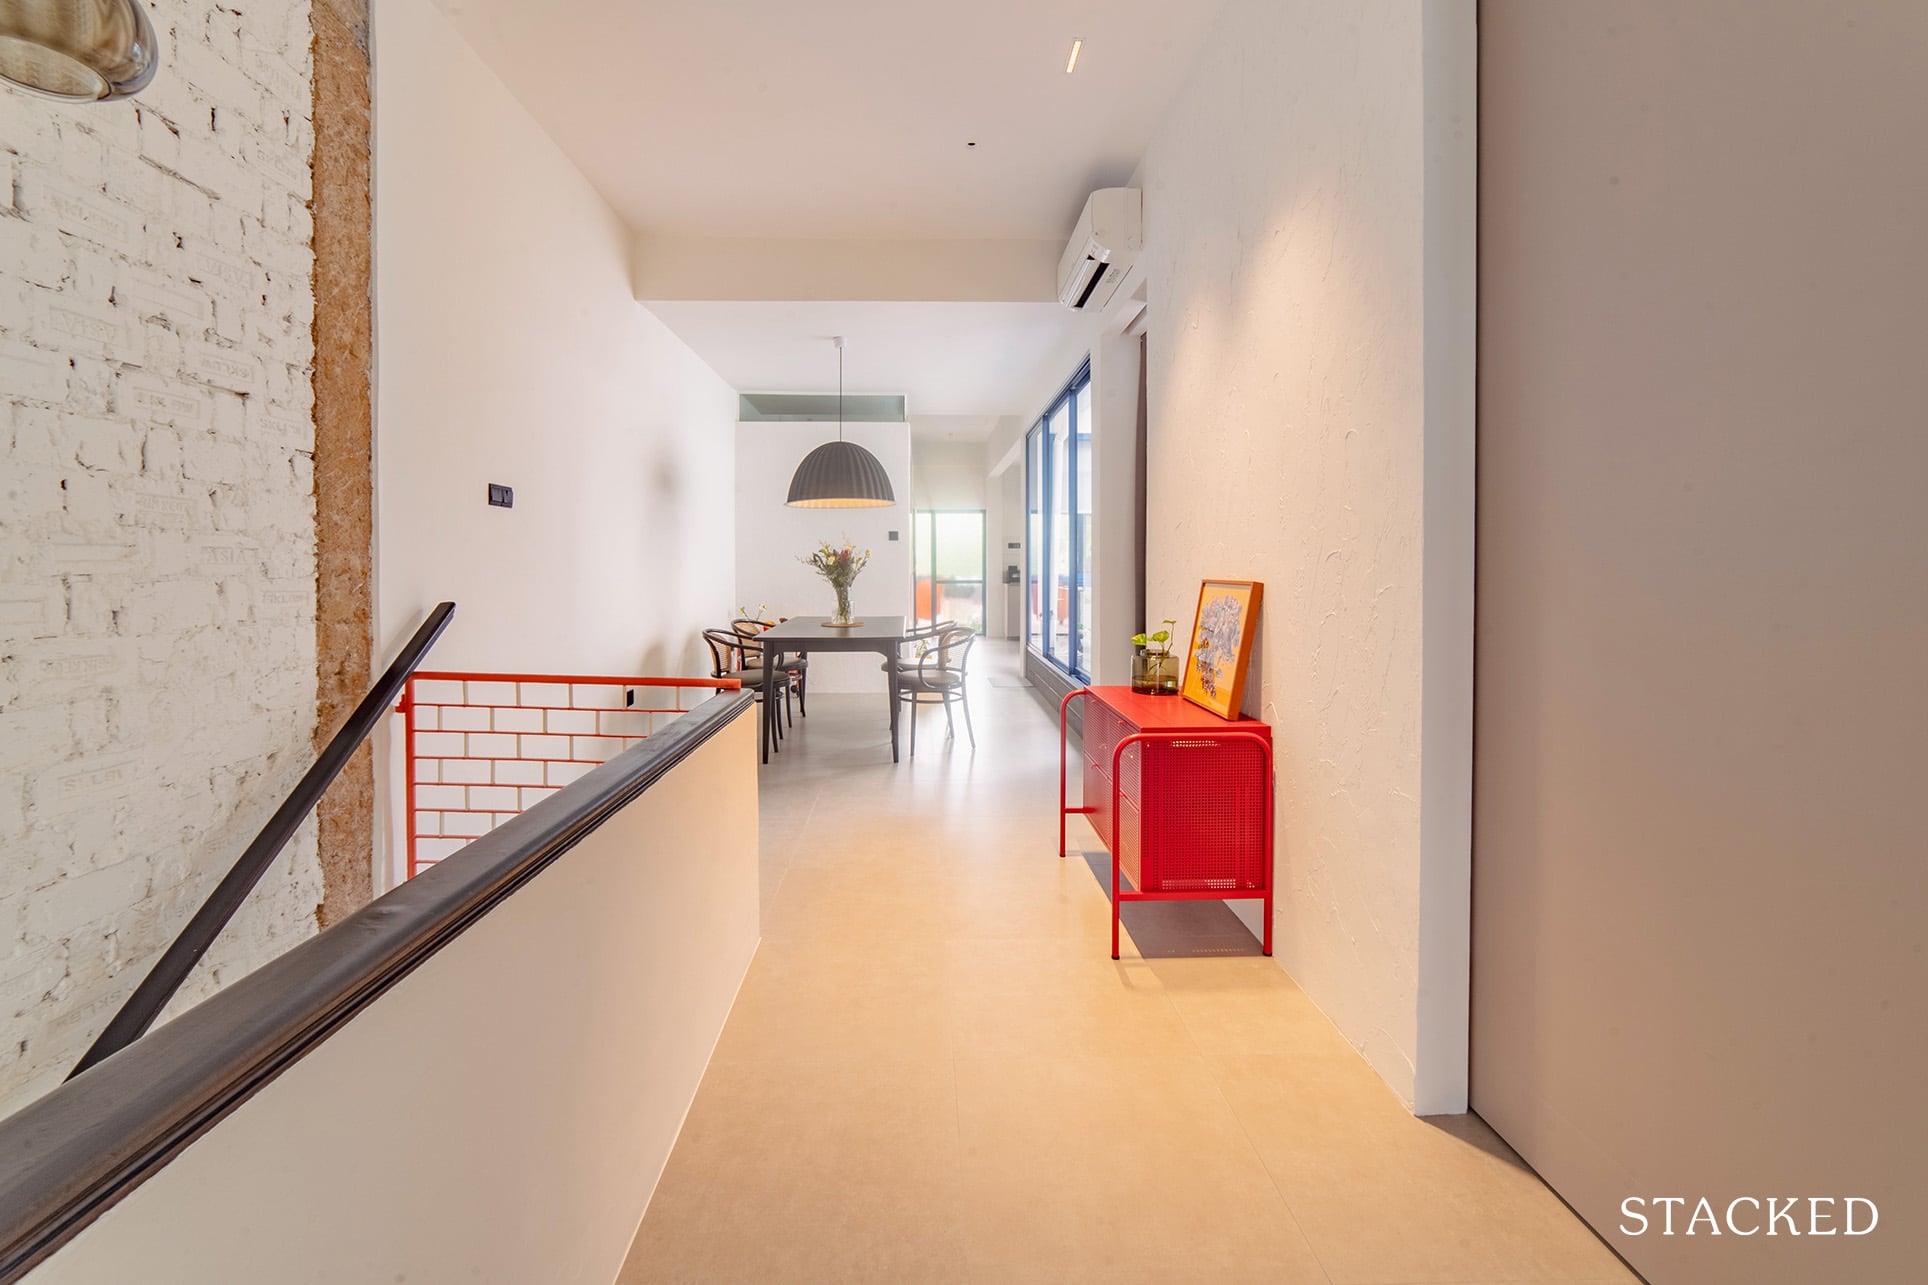
The couple has an IG account called “@living.upstairs“, and you’ll quickly come to understand why they named it as such. As you walk up the flight of stairs that lead to their home, you can see the cute swing gate they installed for their cat.
They combined two rooms at the front of the house as one large space. As a result, it allowed them to have not just a living room but a yoga and workout space as well. This also improved the lighting and ventilation of the apartment immensely.
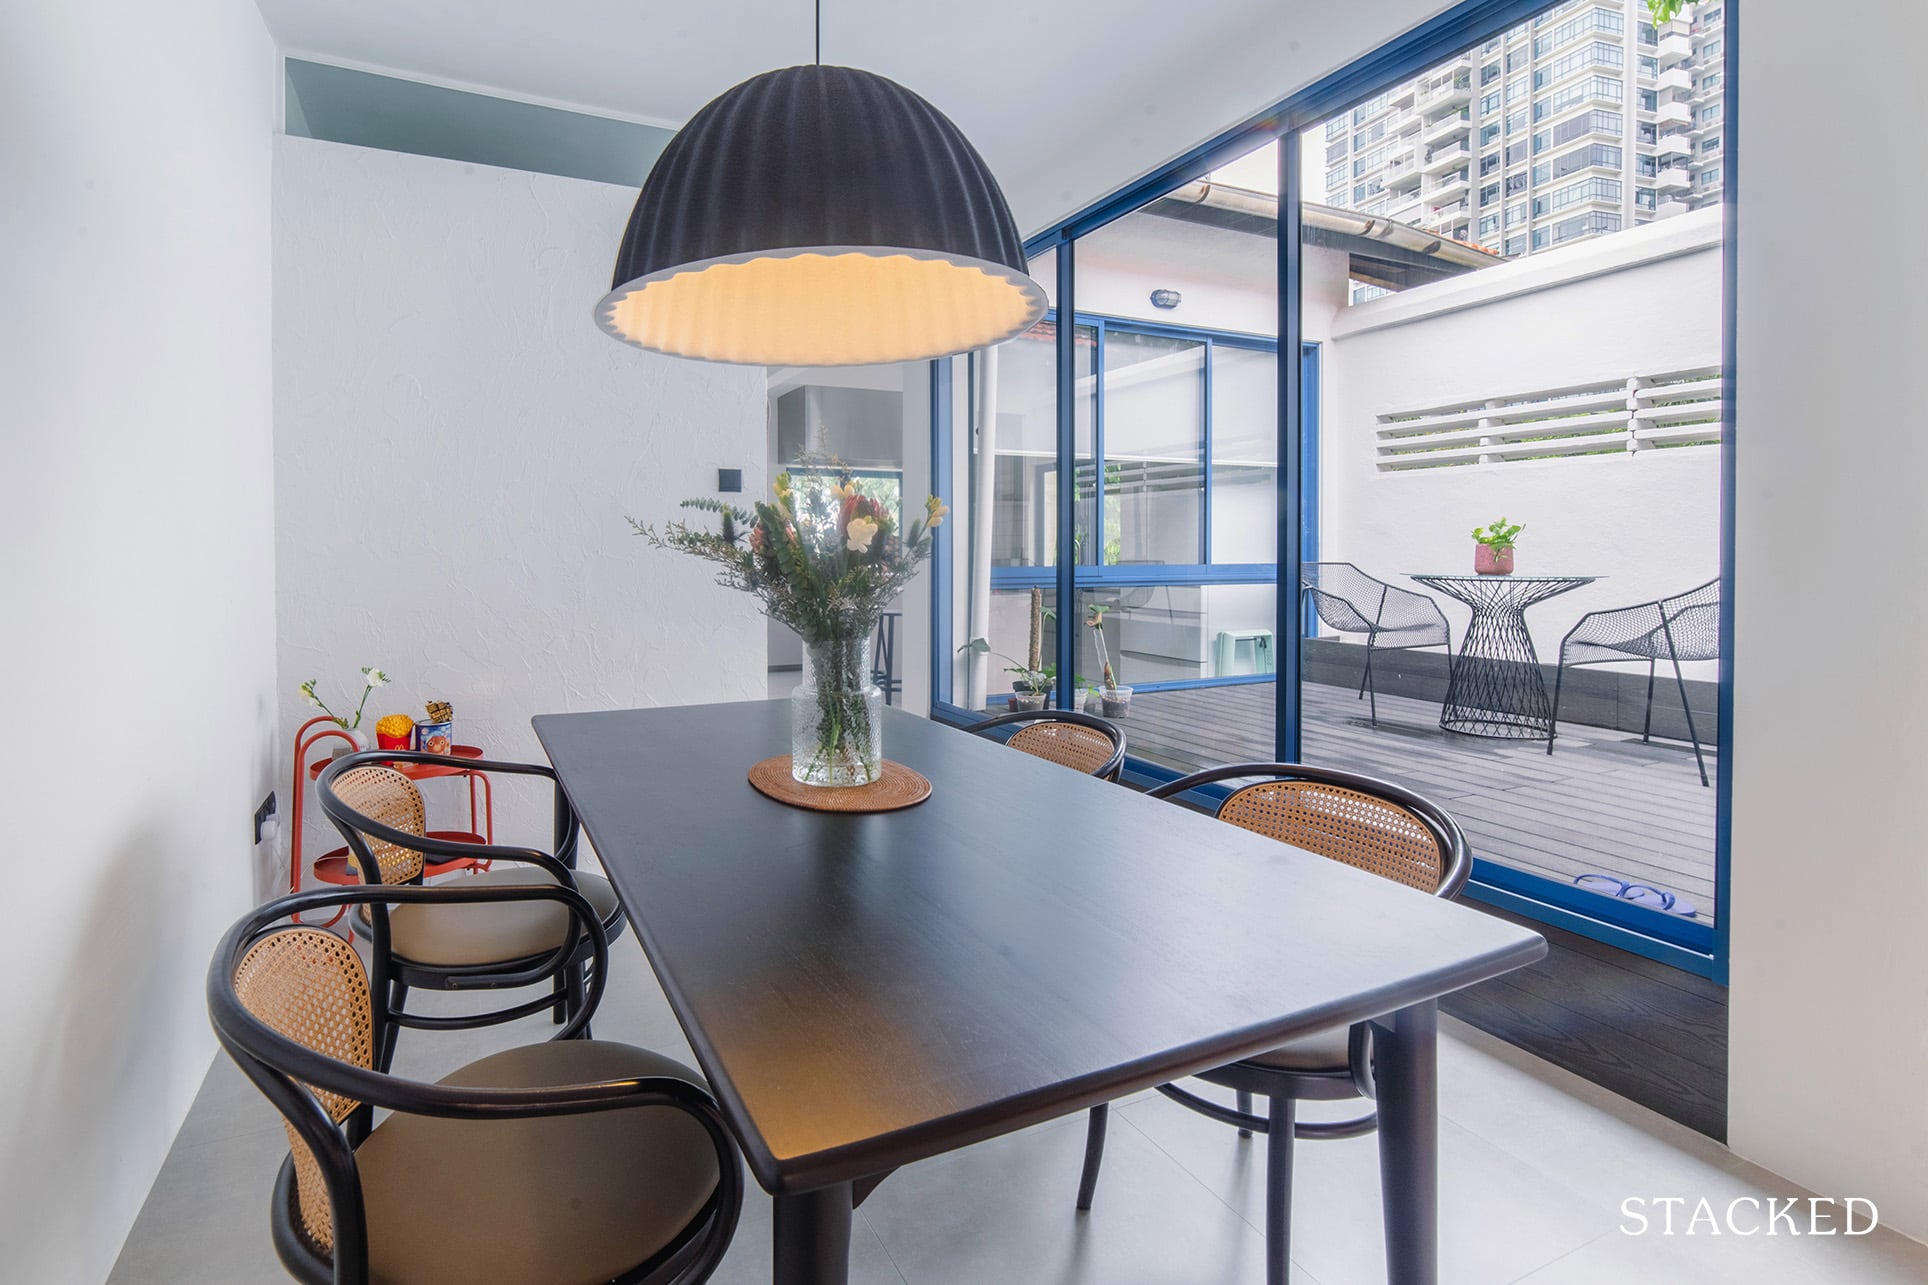
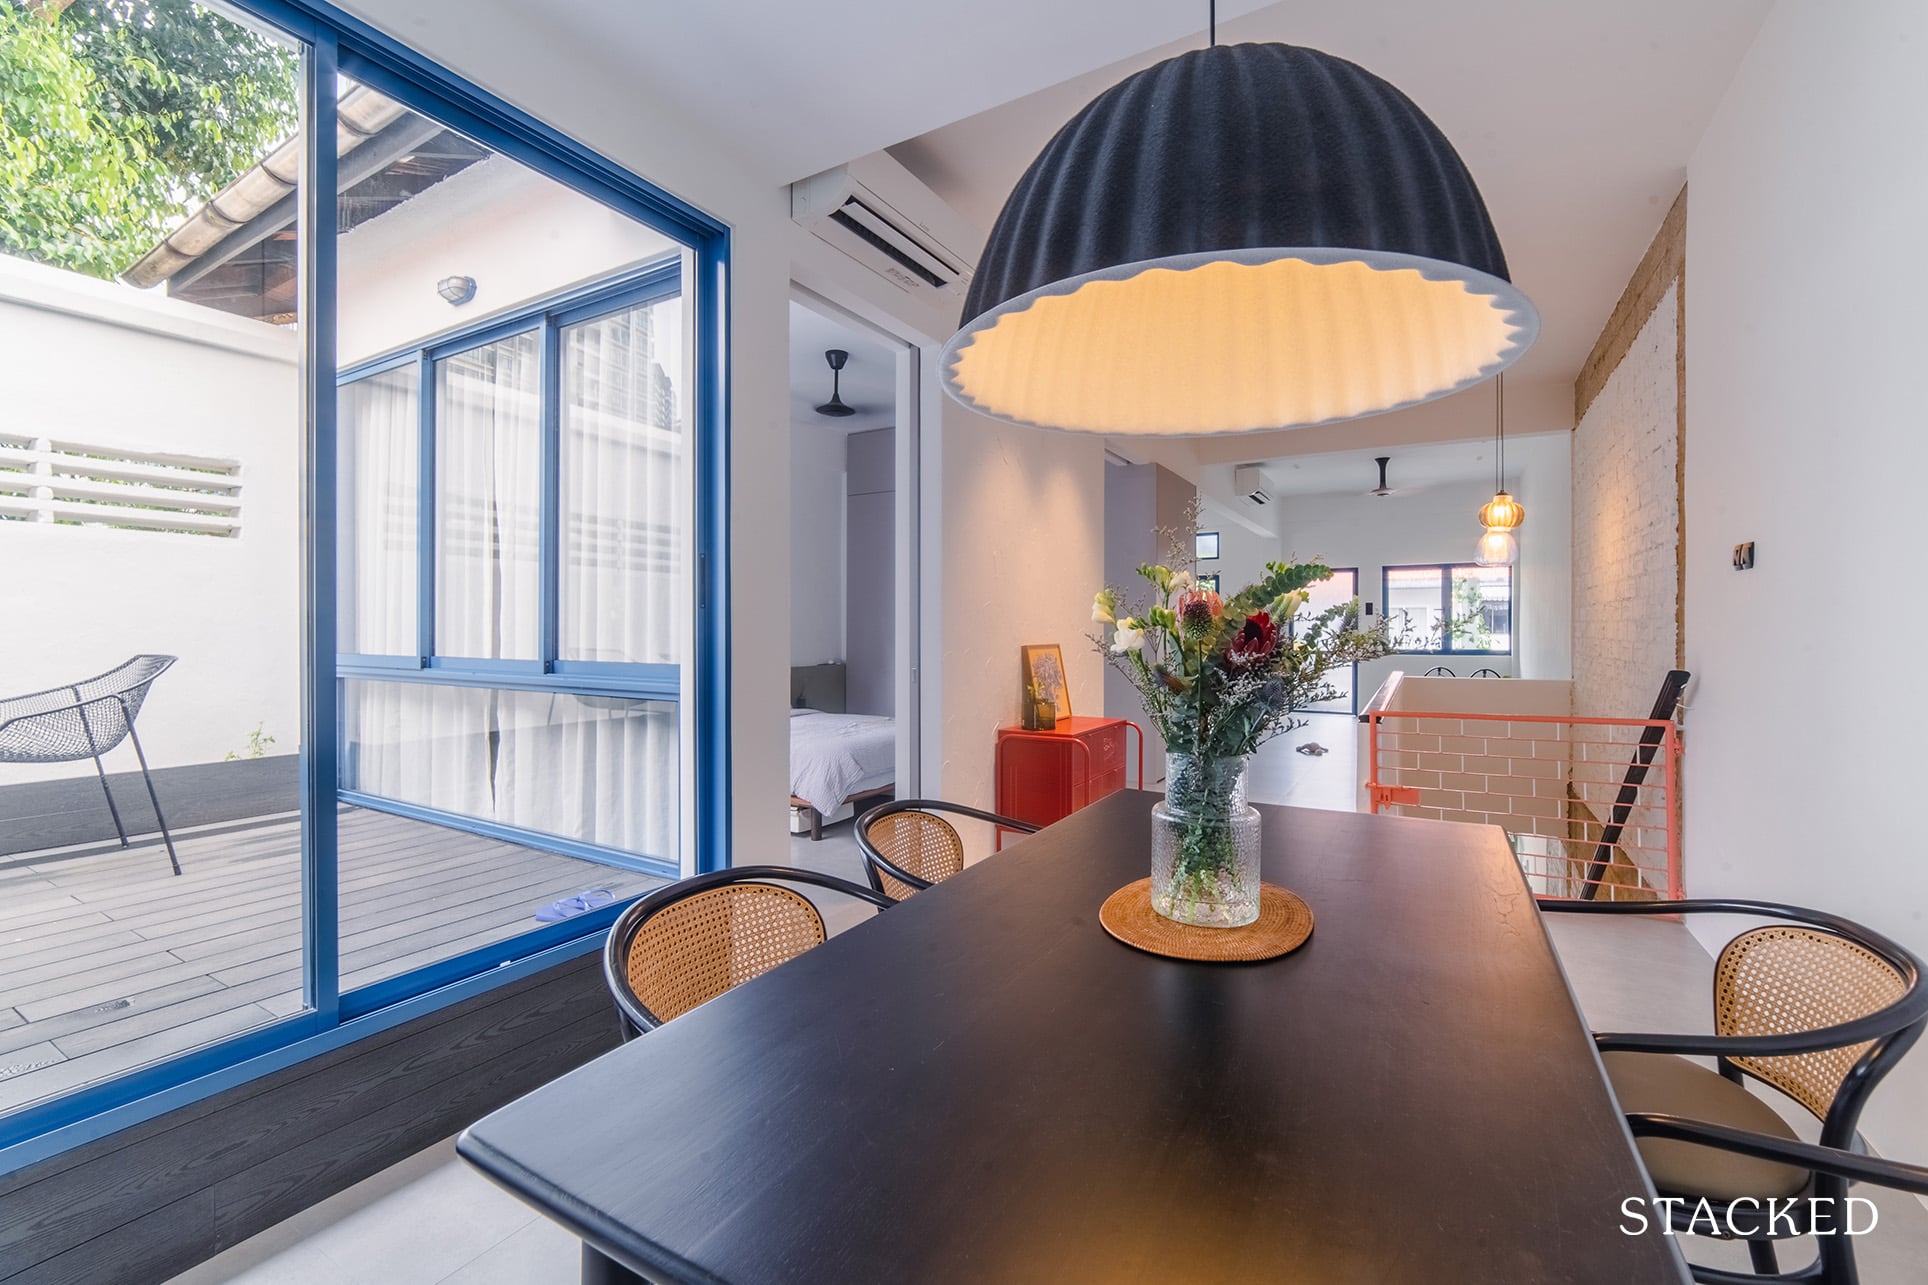
Dining Room
The dining, situated between the living area and kitchen, is also awash with natural lighting and has a good view of their al fresco setup. Not many houses in Singapore would have an air well space, and it’s a really unique spot to have a quiet dinner during the cooler months in Singapore.
You could also easily imagine how cosy this area is in the evening with the warm light coming from the pendant lighting.
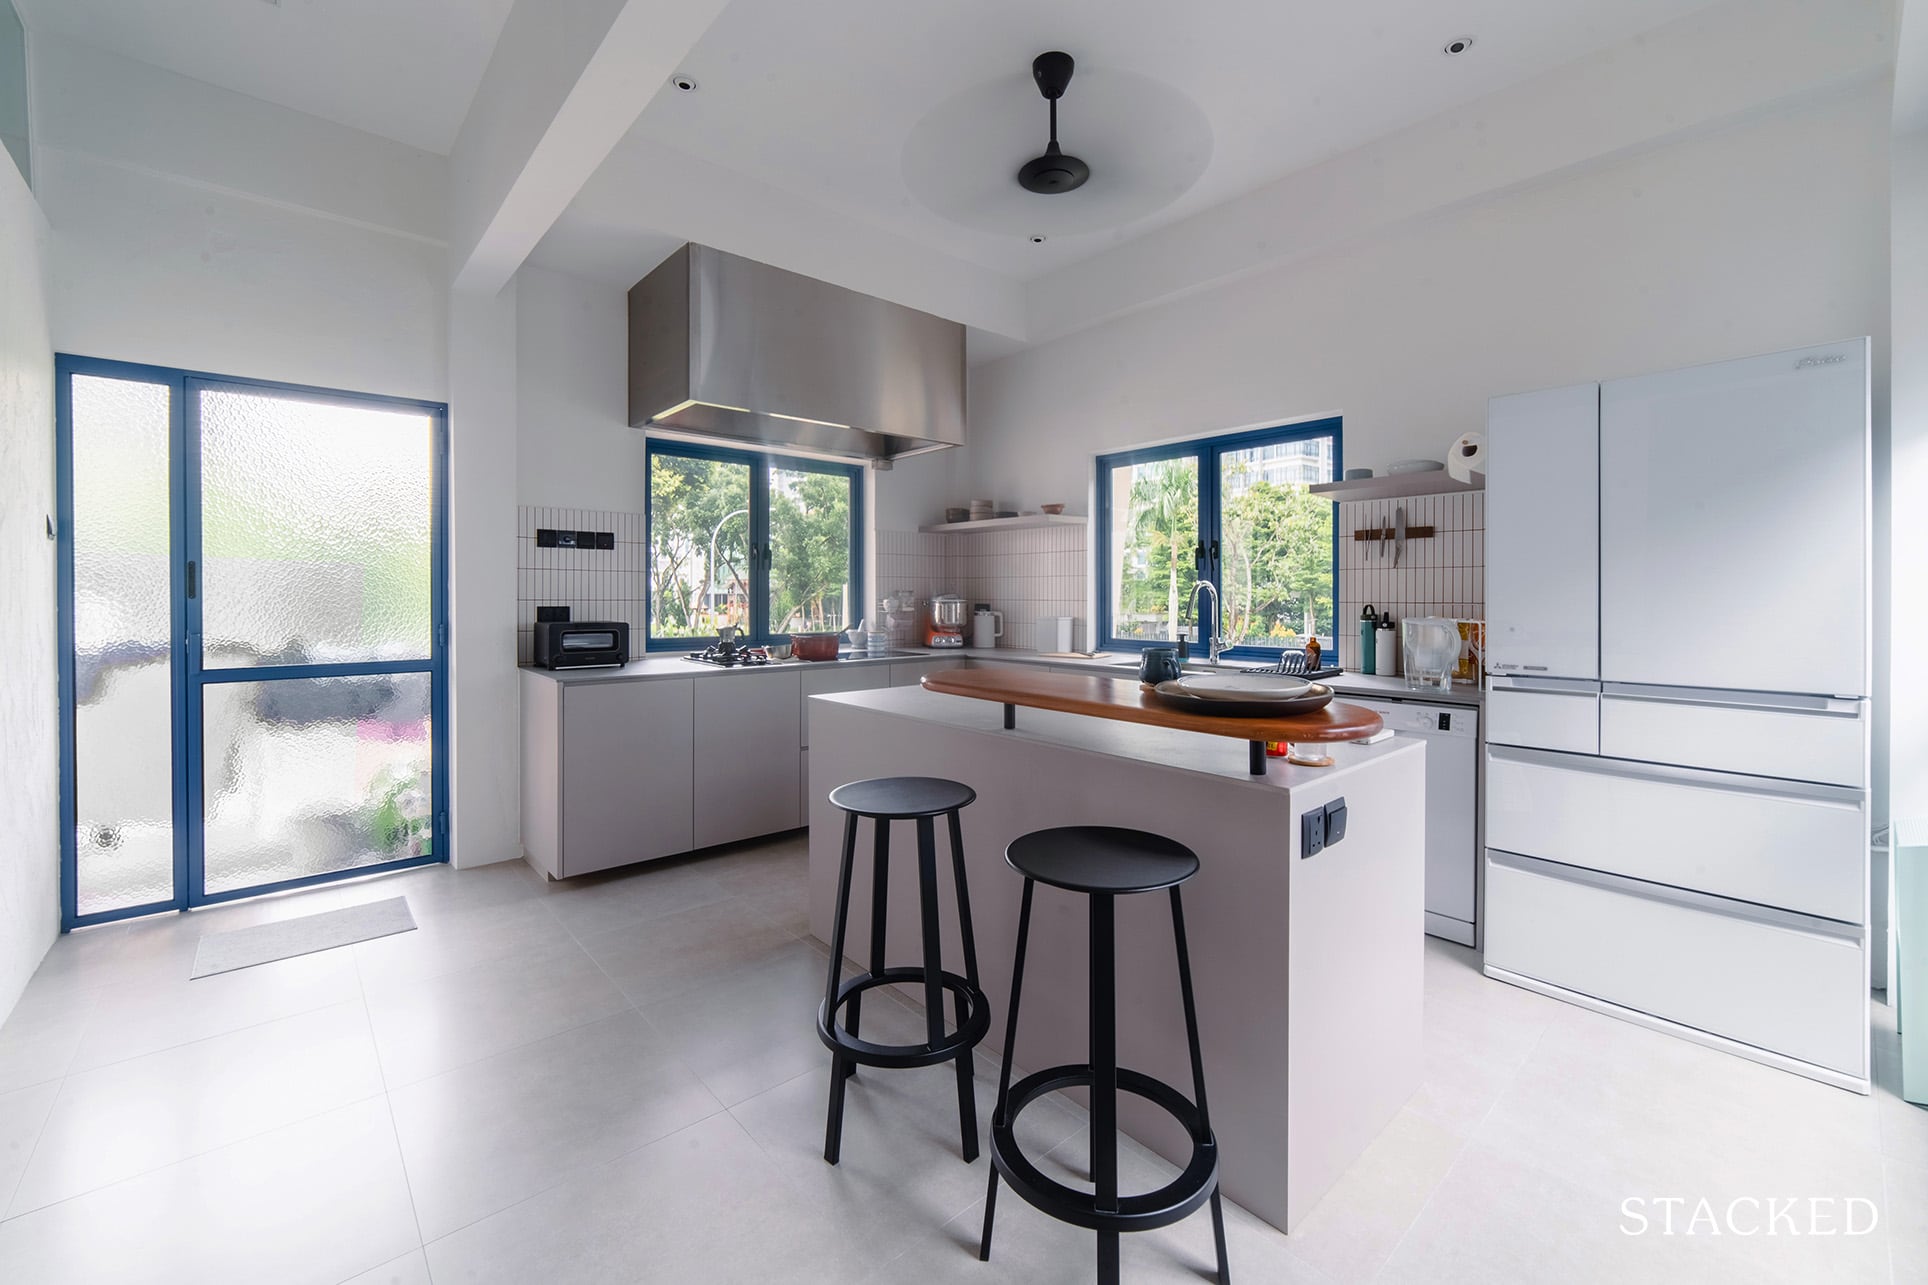
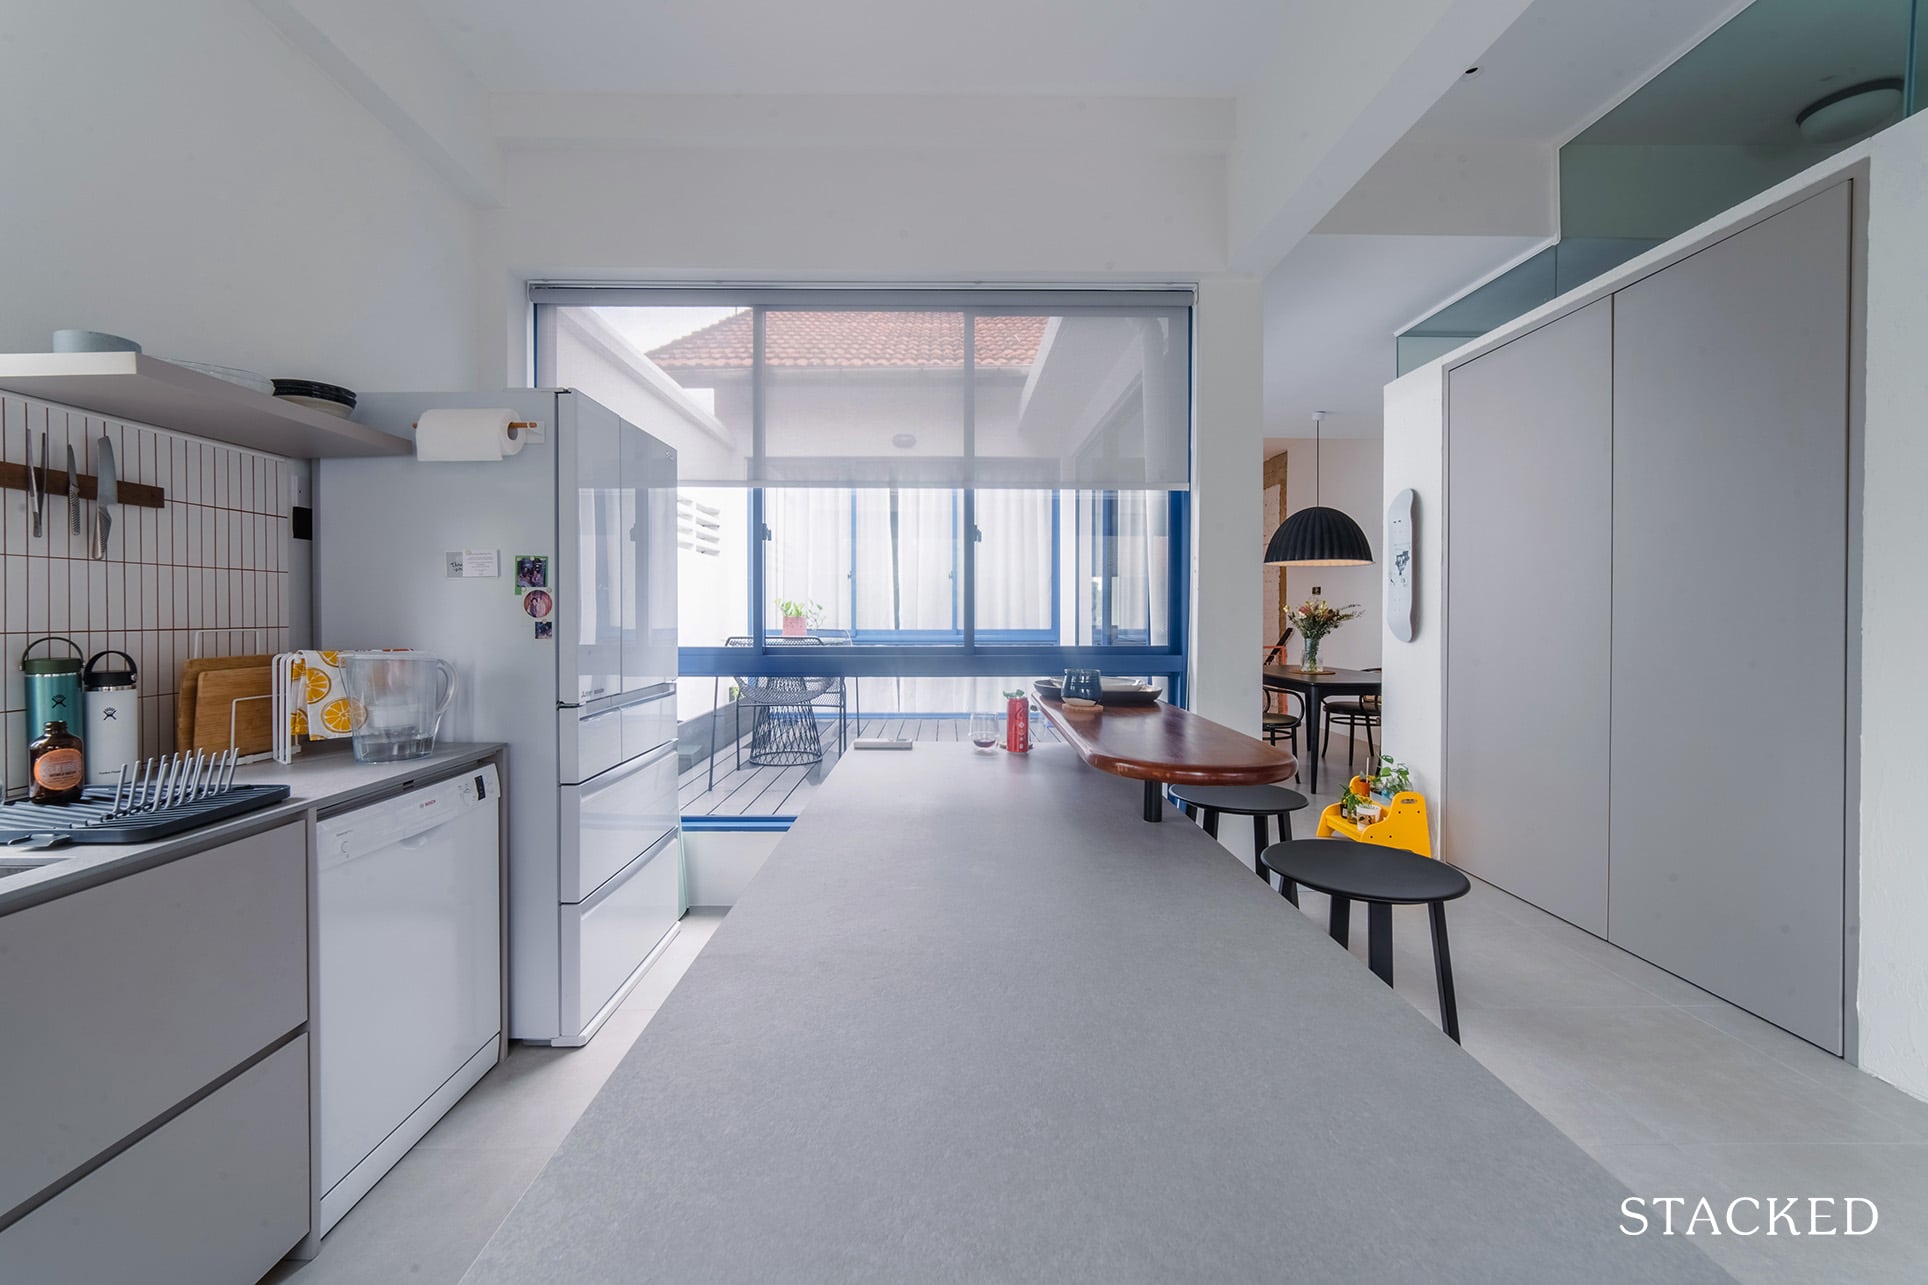
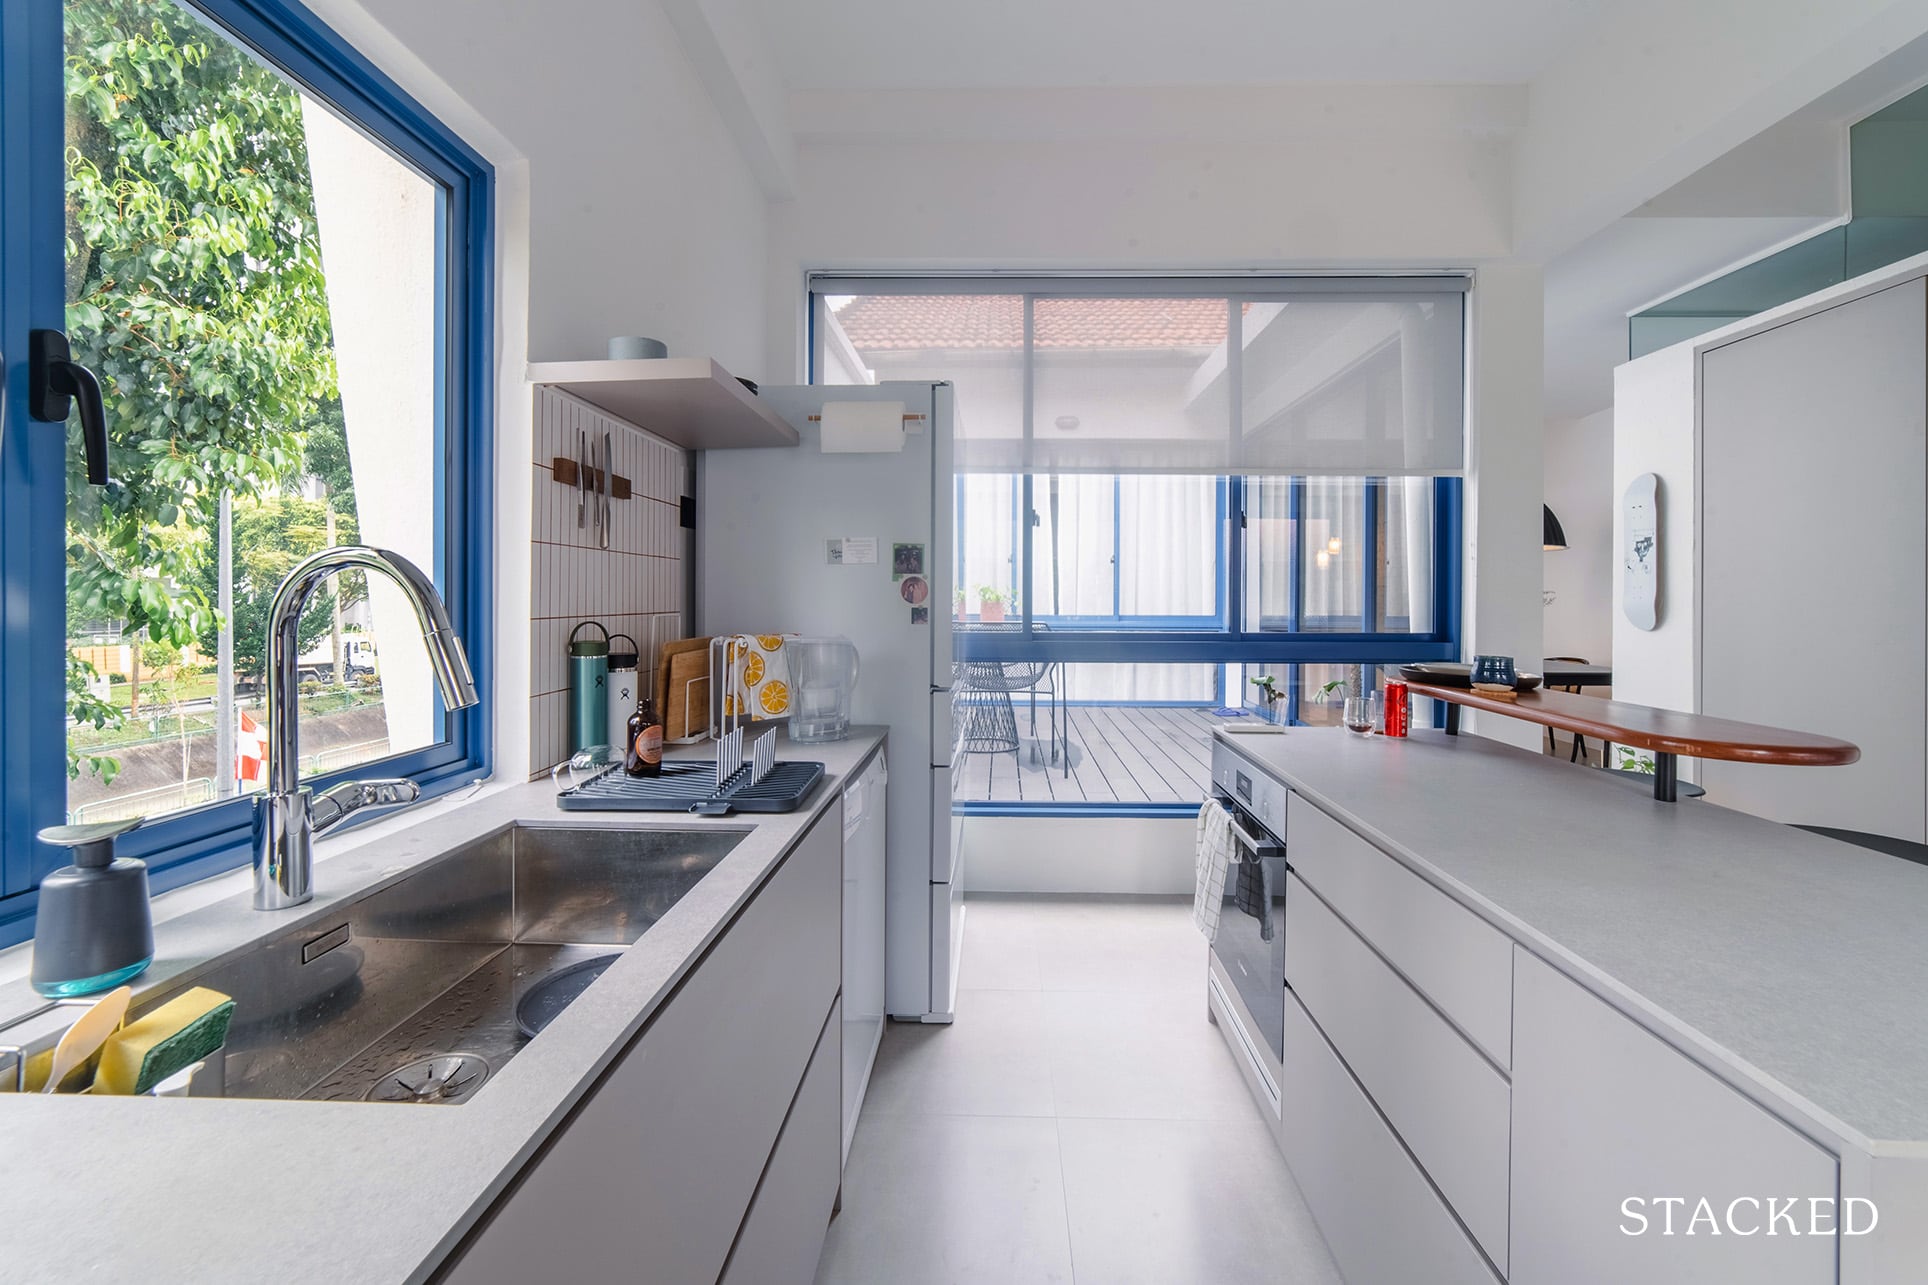
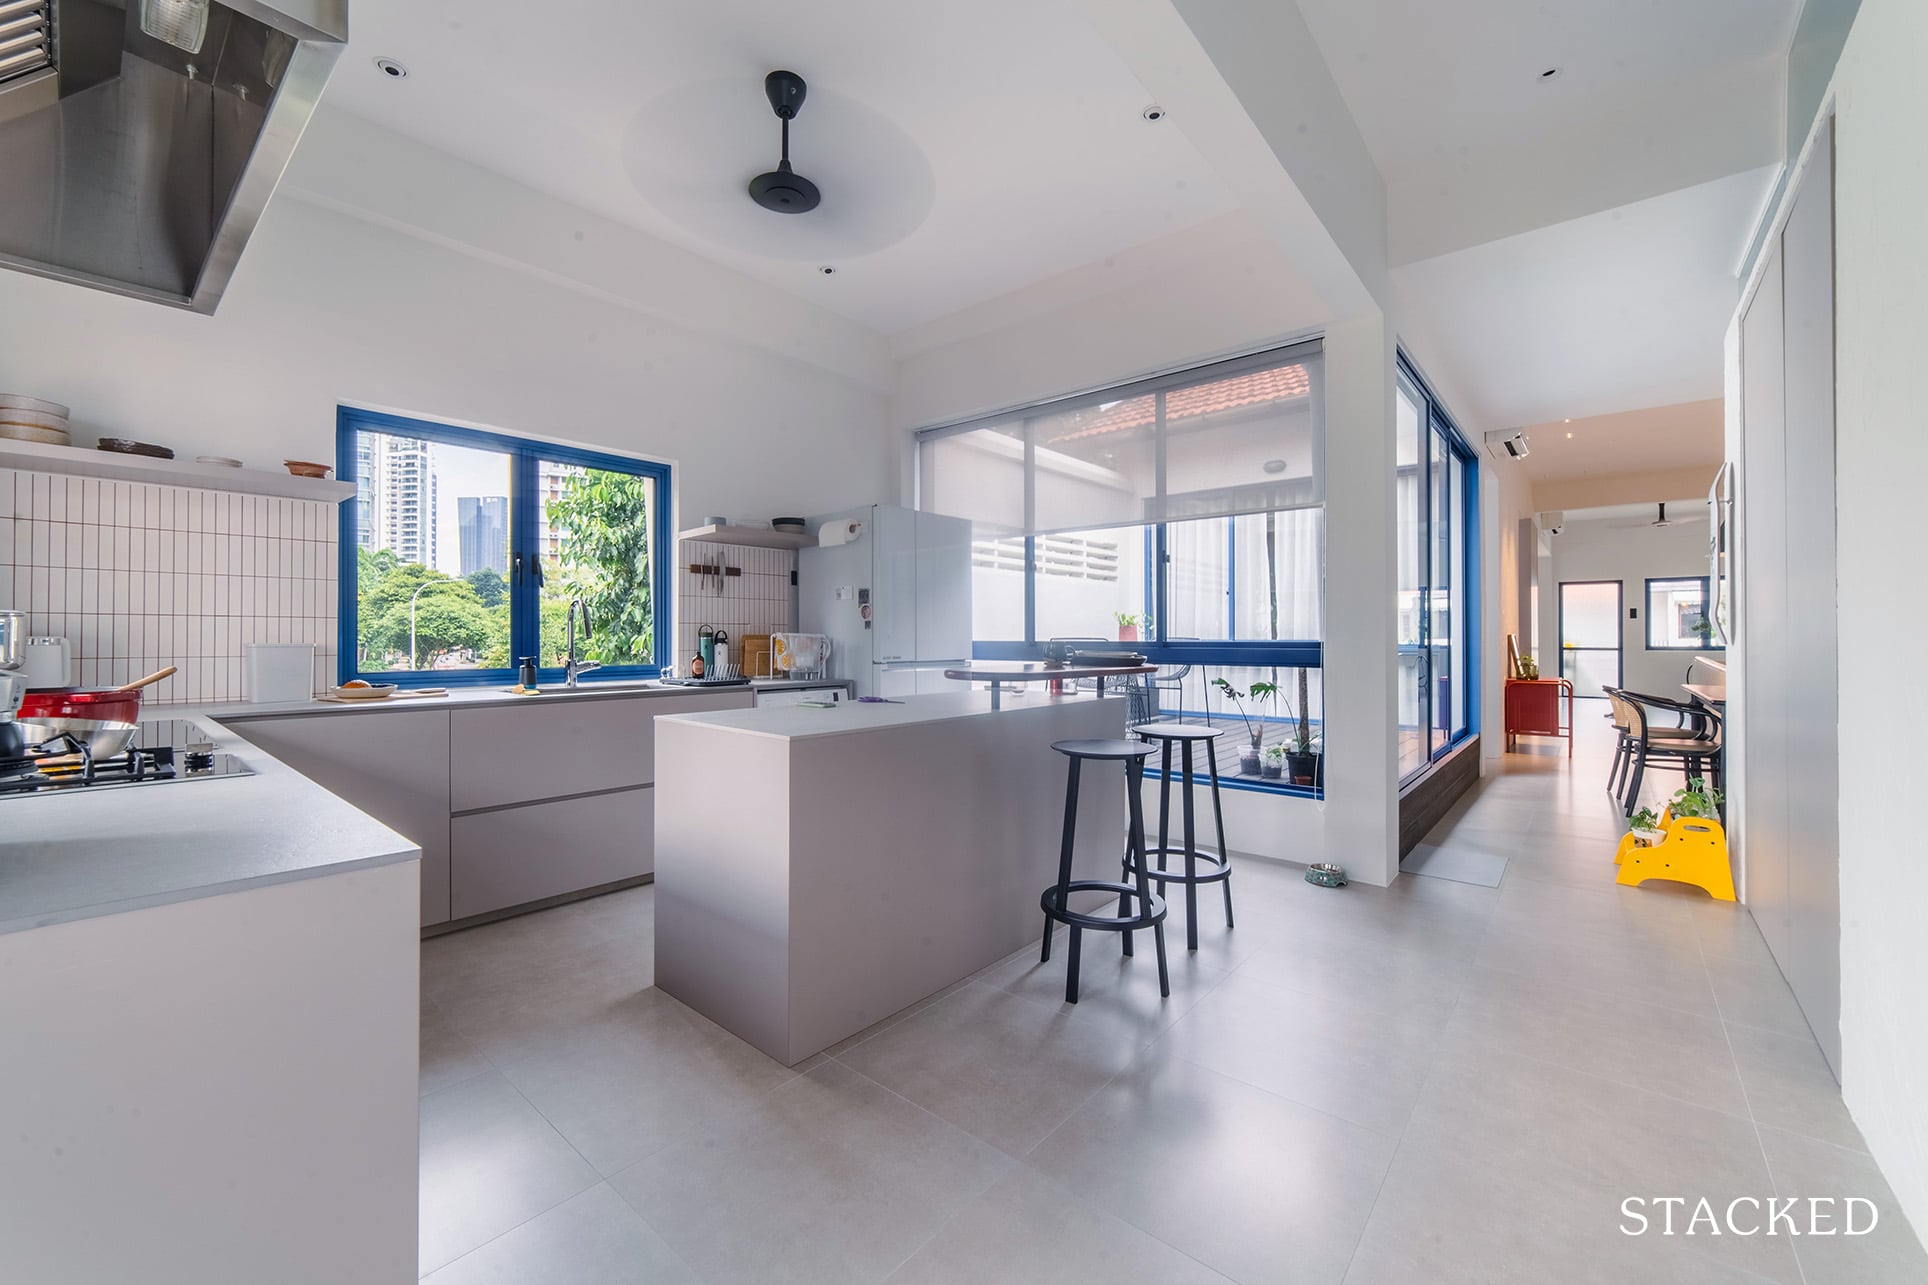
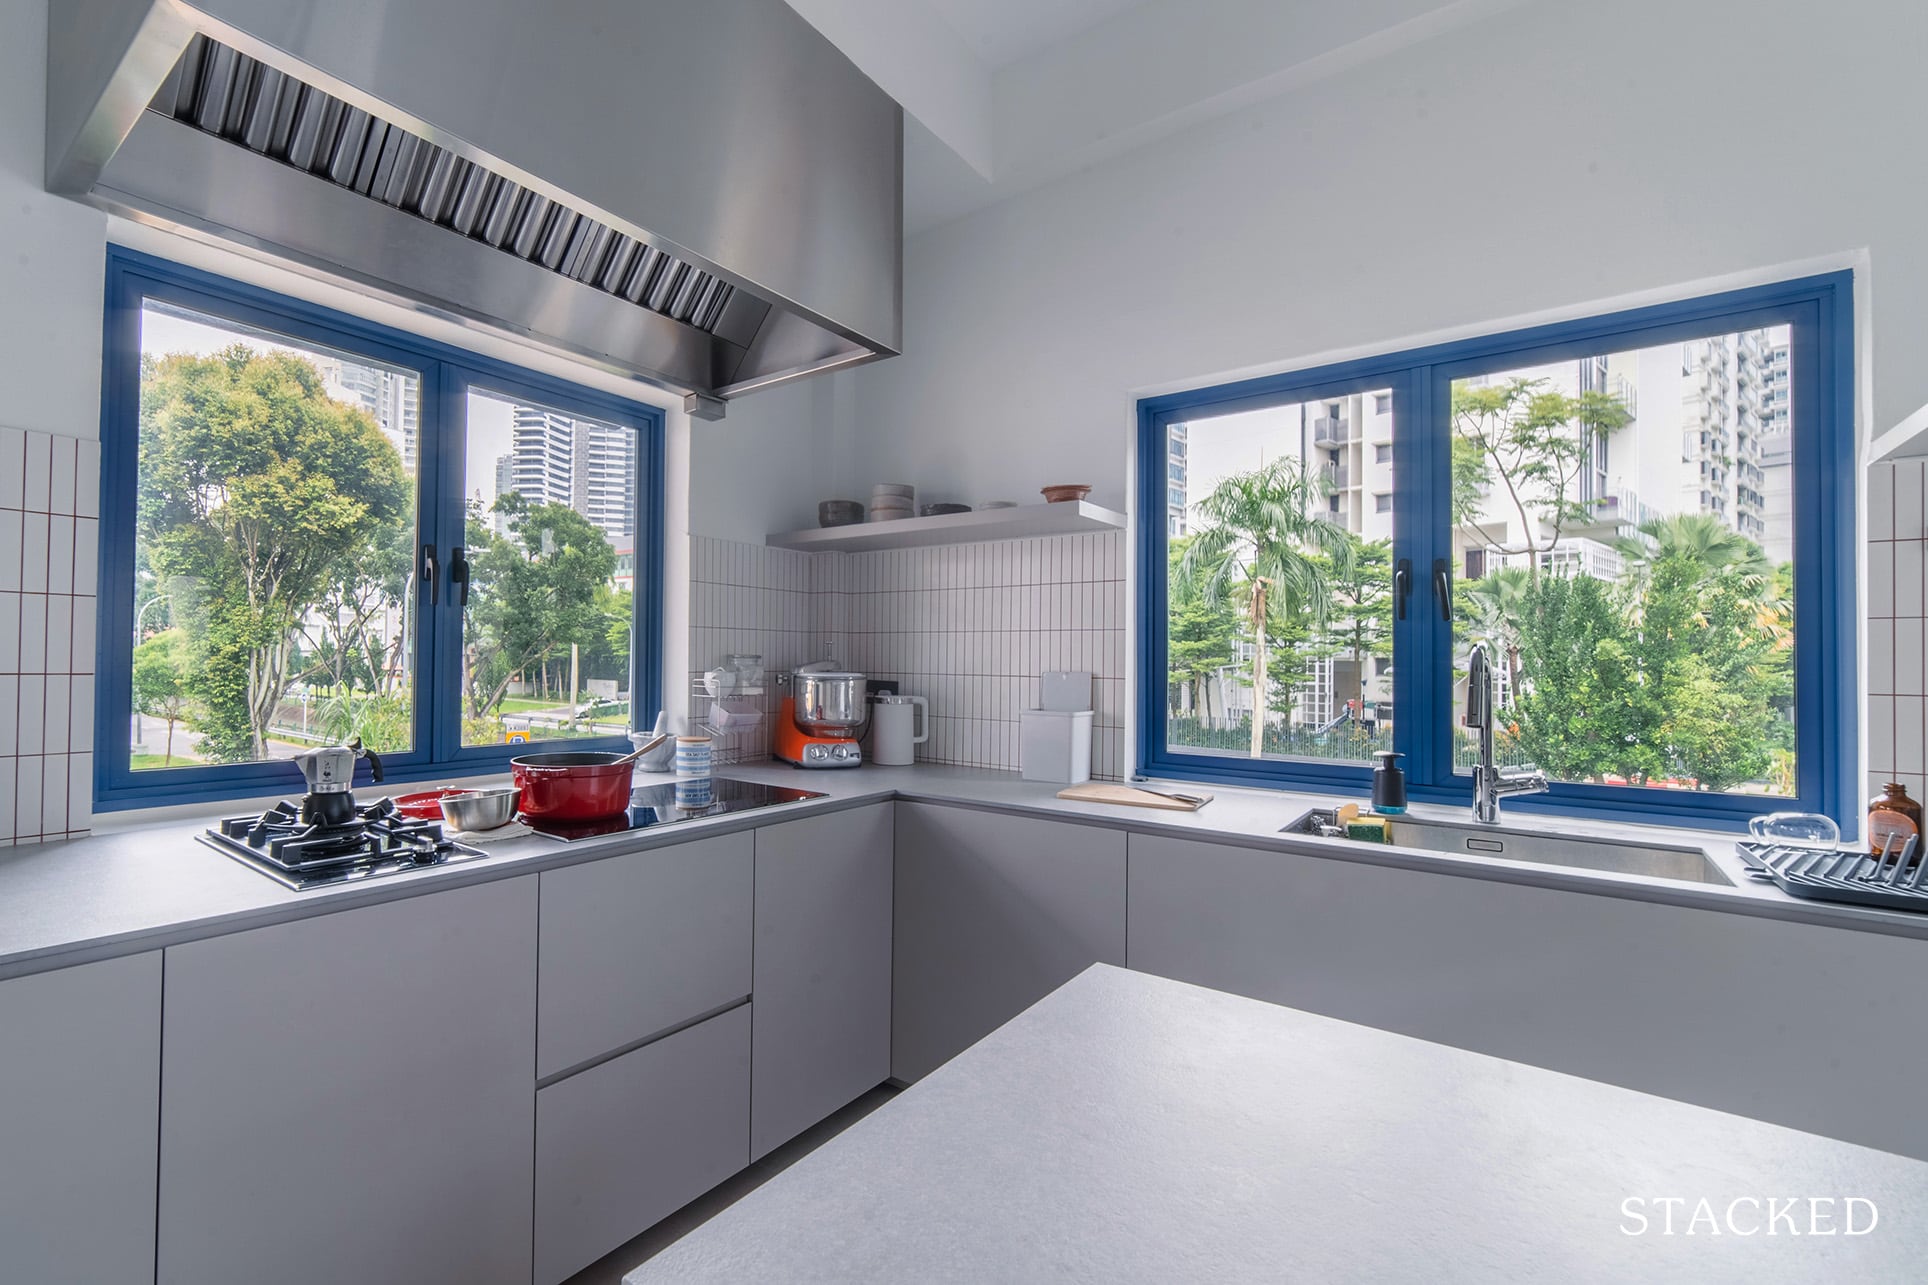
Kitchen Area
Another item on the couple’s wishlist is a large kitchen. They knew that this would be where they would be spending most of their time as they both love to cook.
Michelle said that they chose to use the back of the home for their kitchen as it was relatively spacious and well-ventilated, aside from offering great views of the surrounding greenery. It was also a practical choice for them because, compared to other rooms in the house, it was the closest to the existing water line.
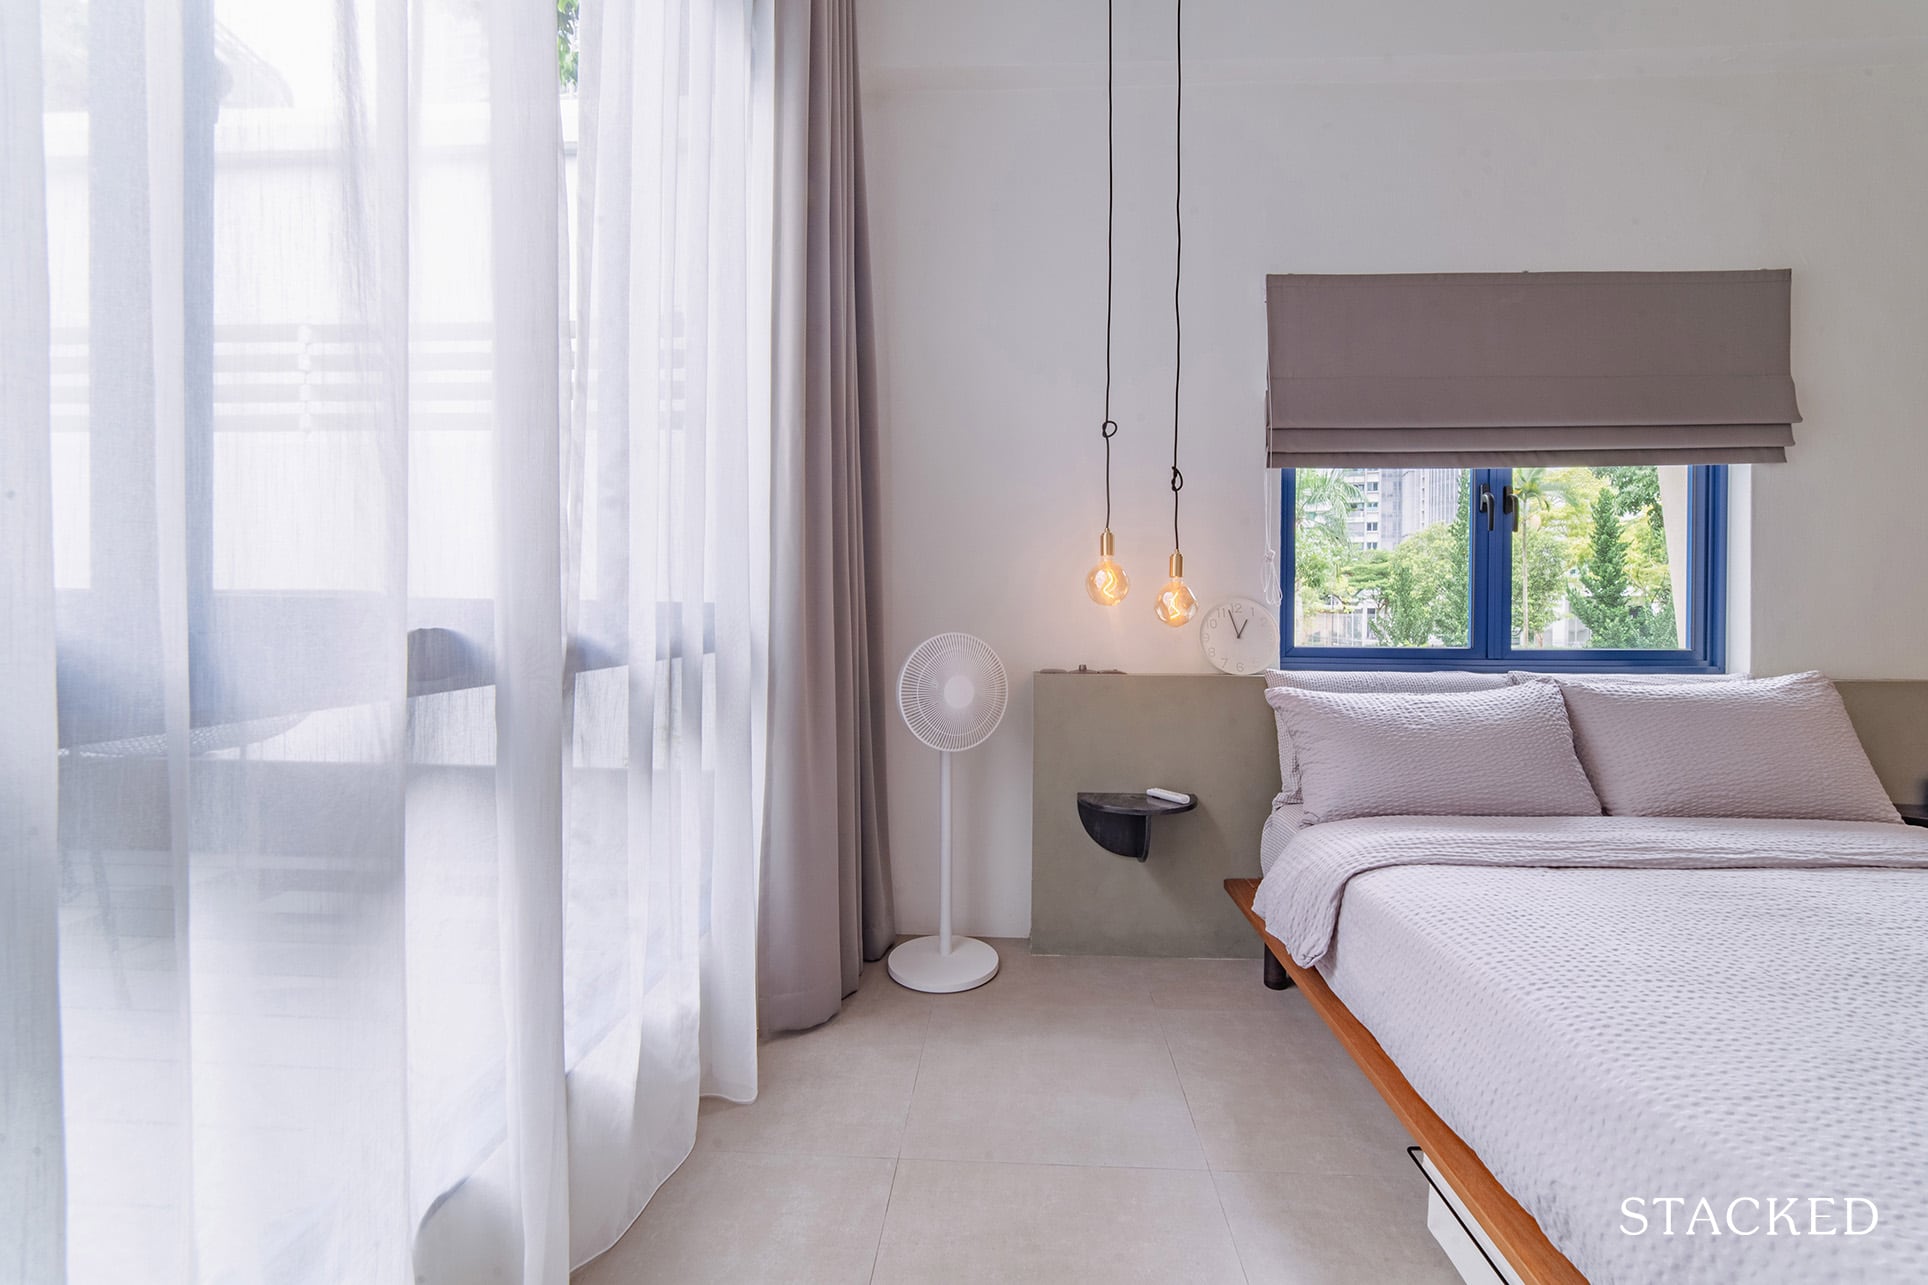
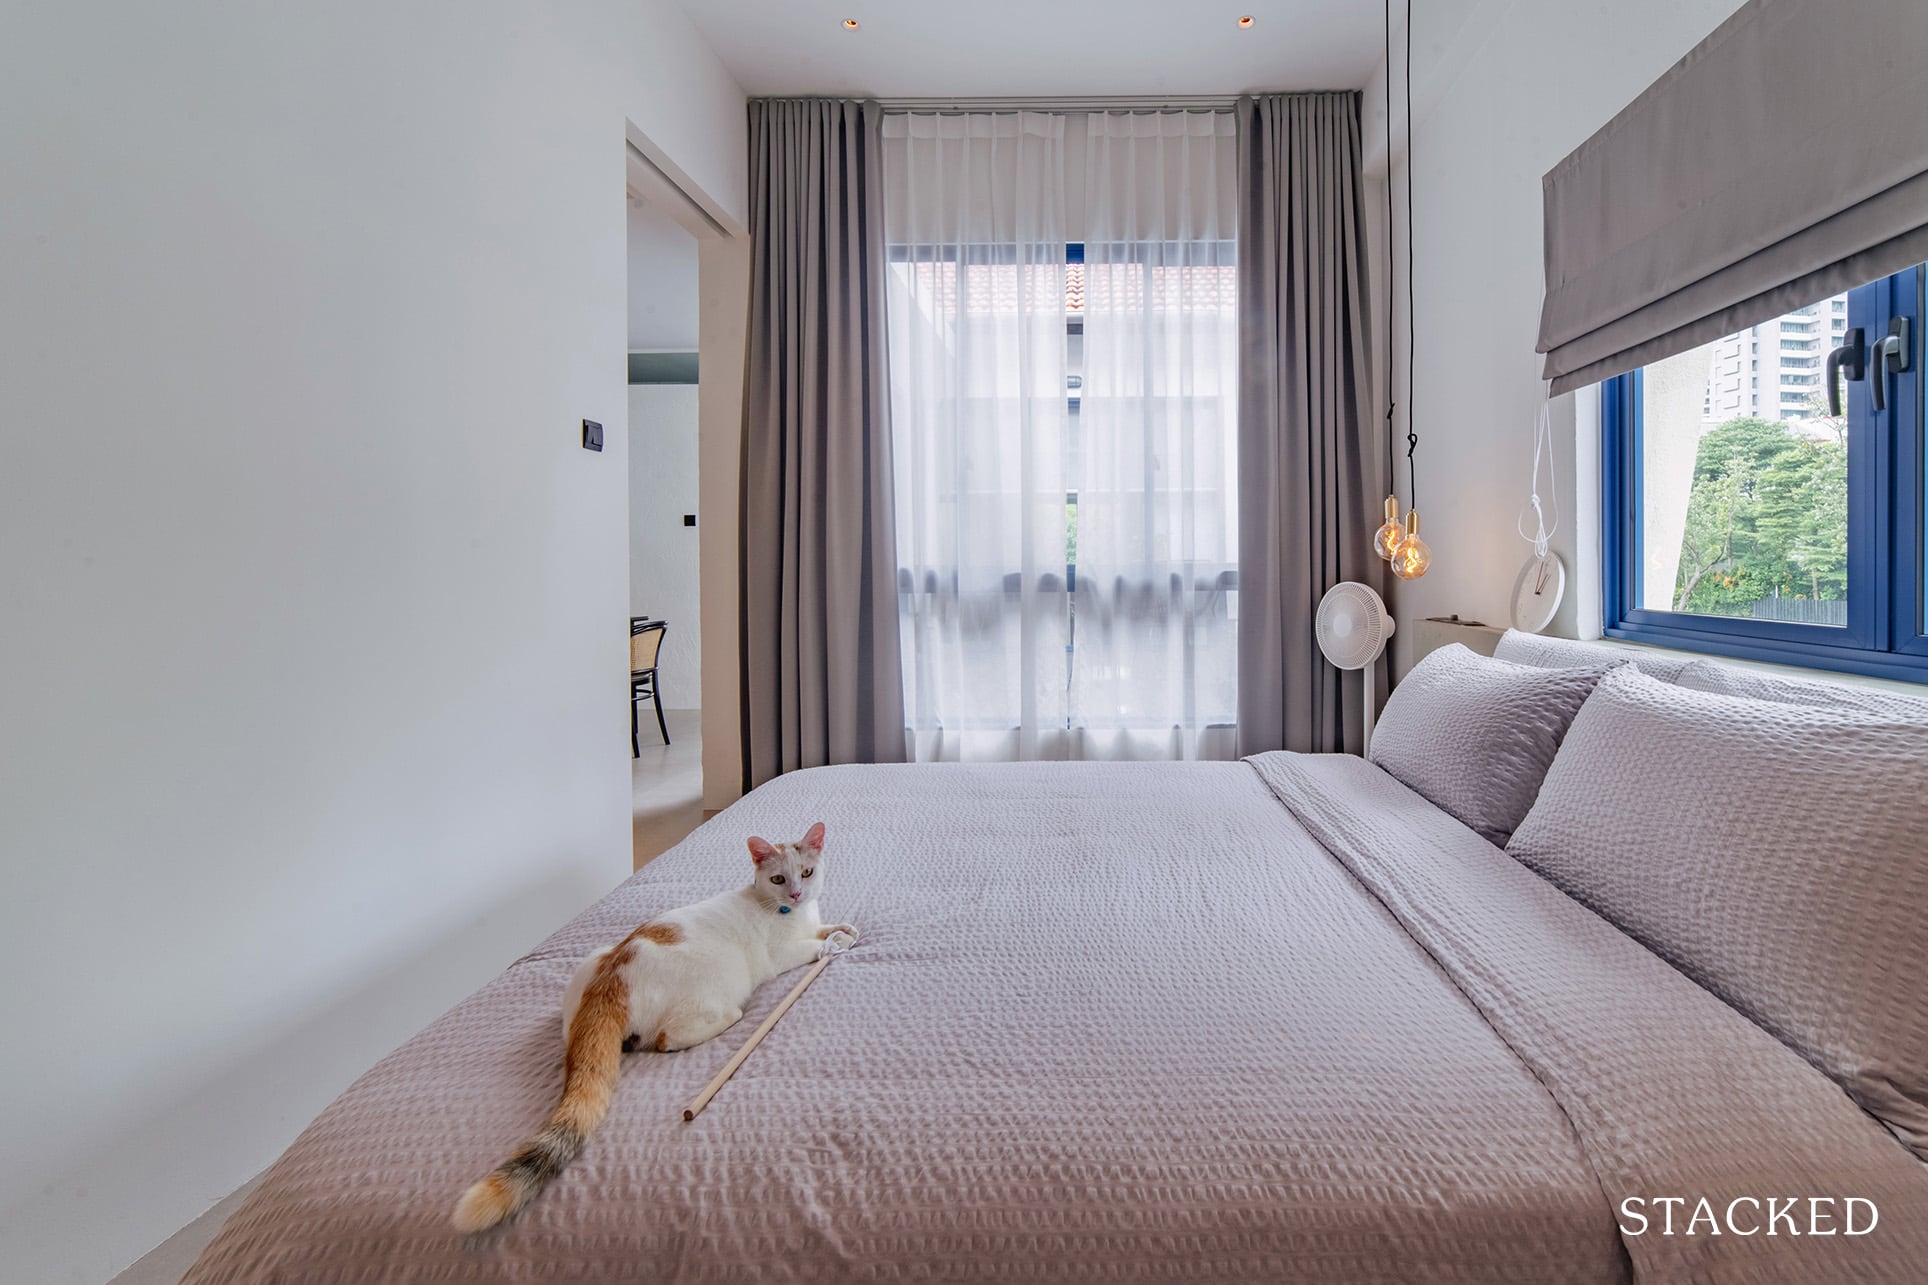
Bedroom
The original layout had two bedrooms in the front, a living room and kitchen in the middle, and an additional bedroom and a toilet at the back. They knocked down all the walls and decided to have their bedroom in the middle of the apartment instead, where the original living room was located.
It was kept intentionally simple (as all bedrooms should be for restful sleep), with neutral grey tones and dual hanging exposed light bulbs forming a part of the light source for the room.
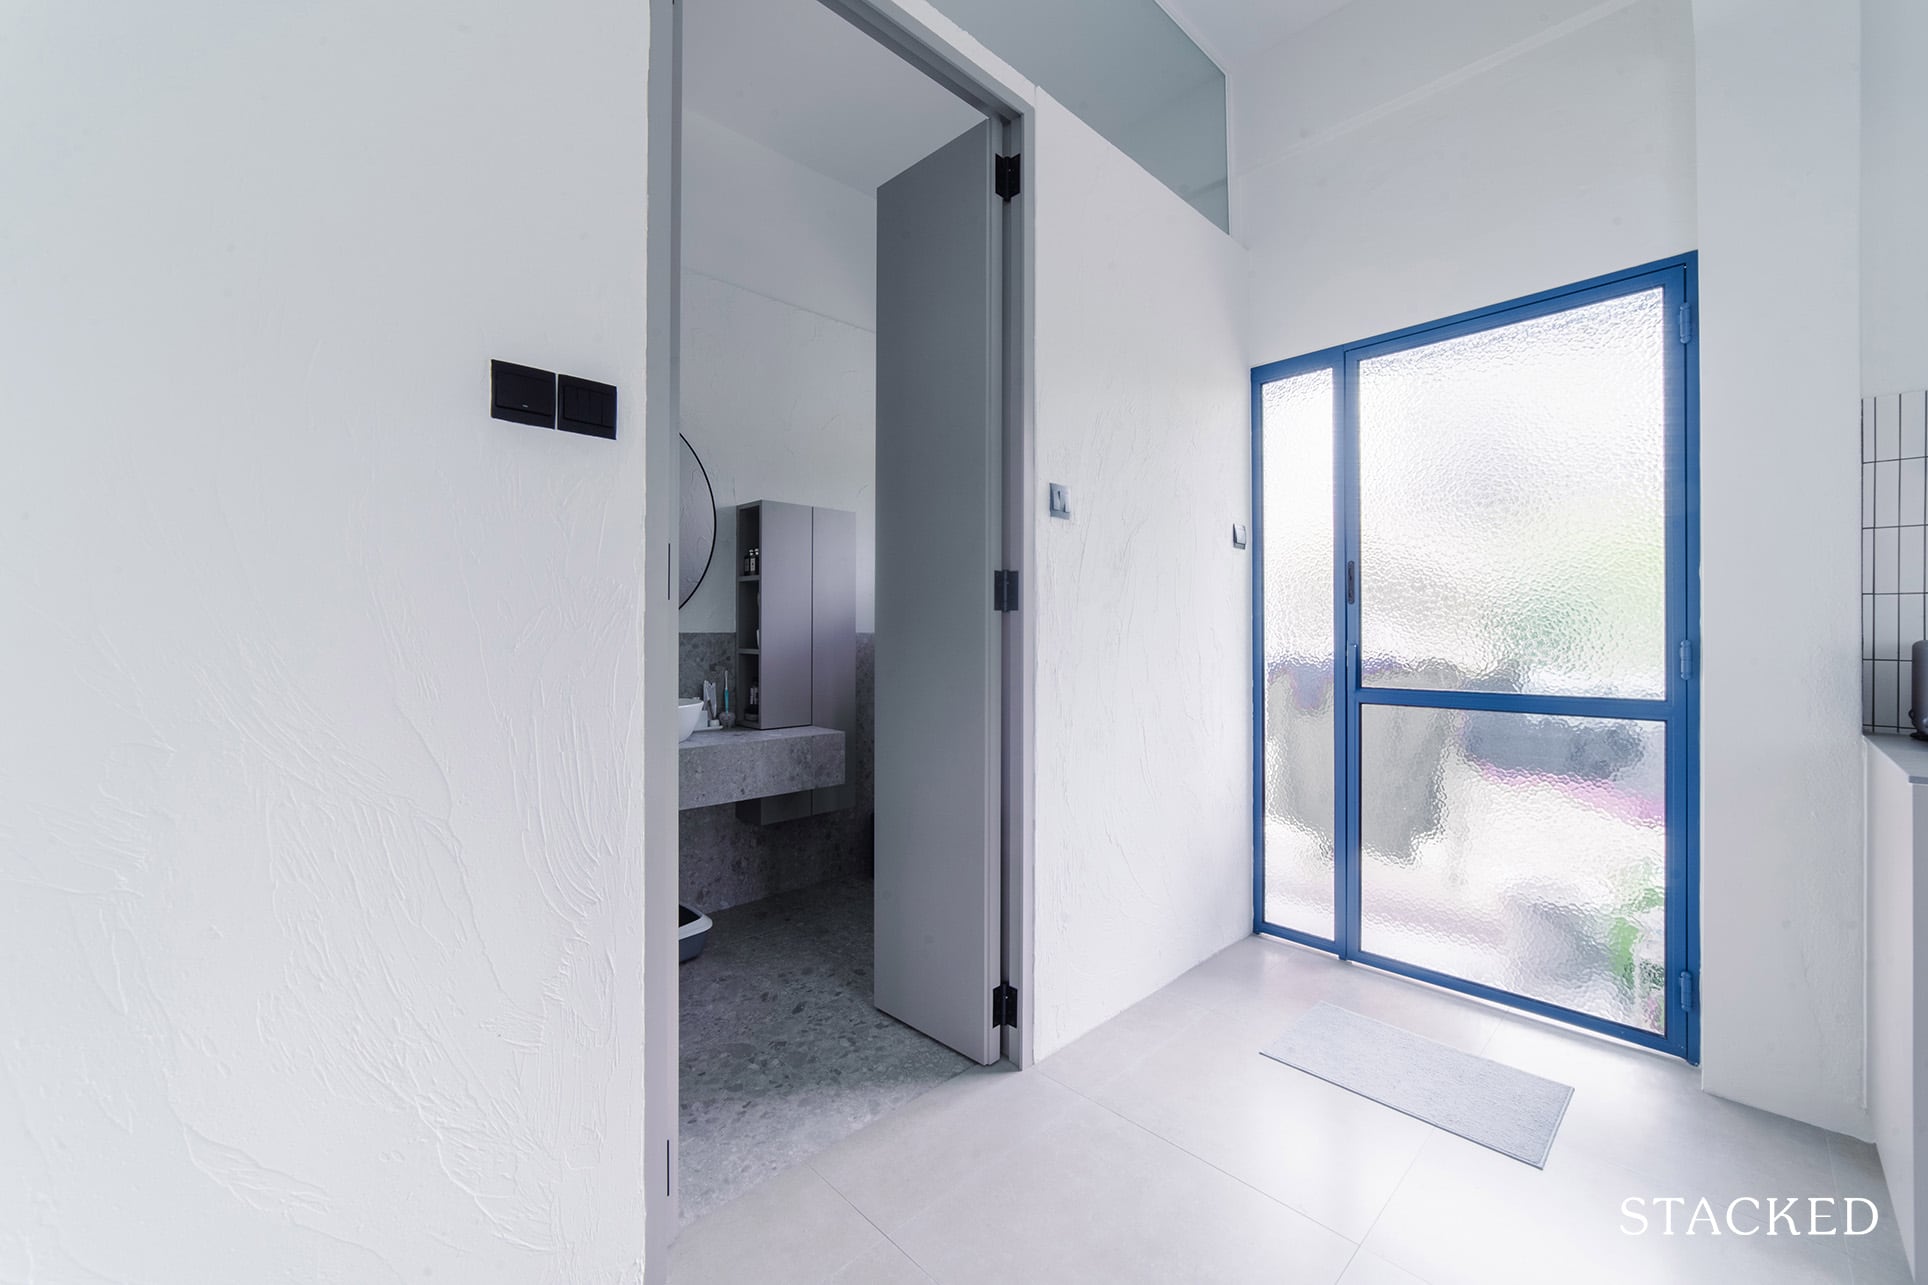
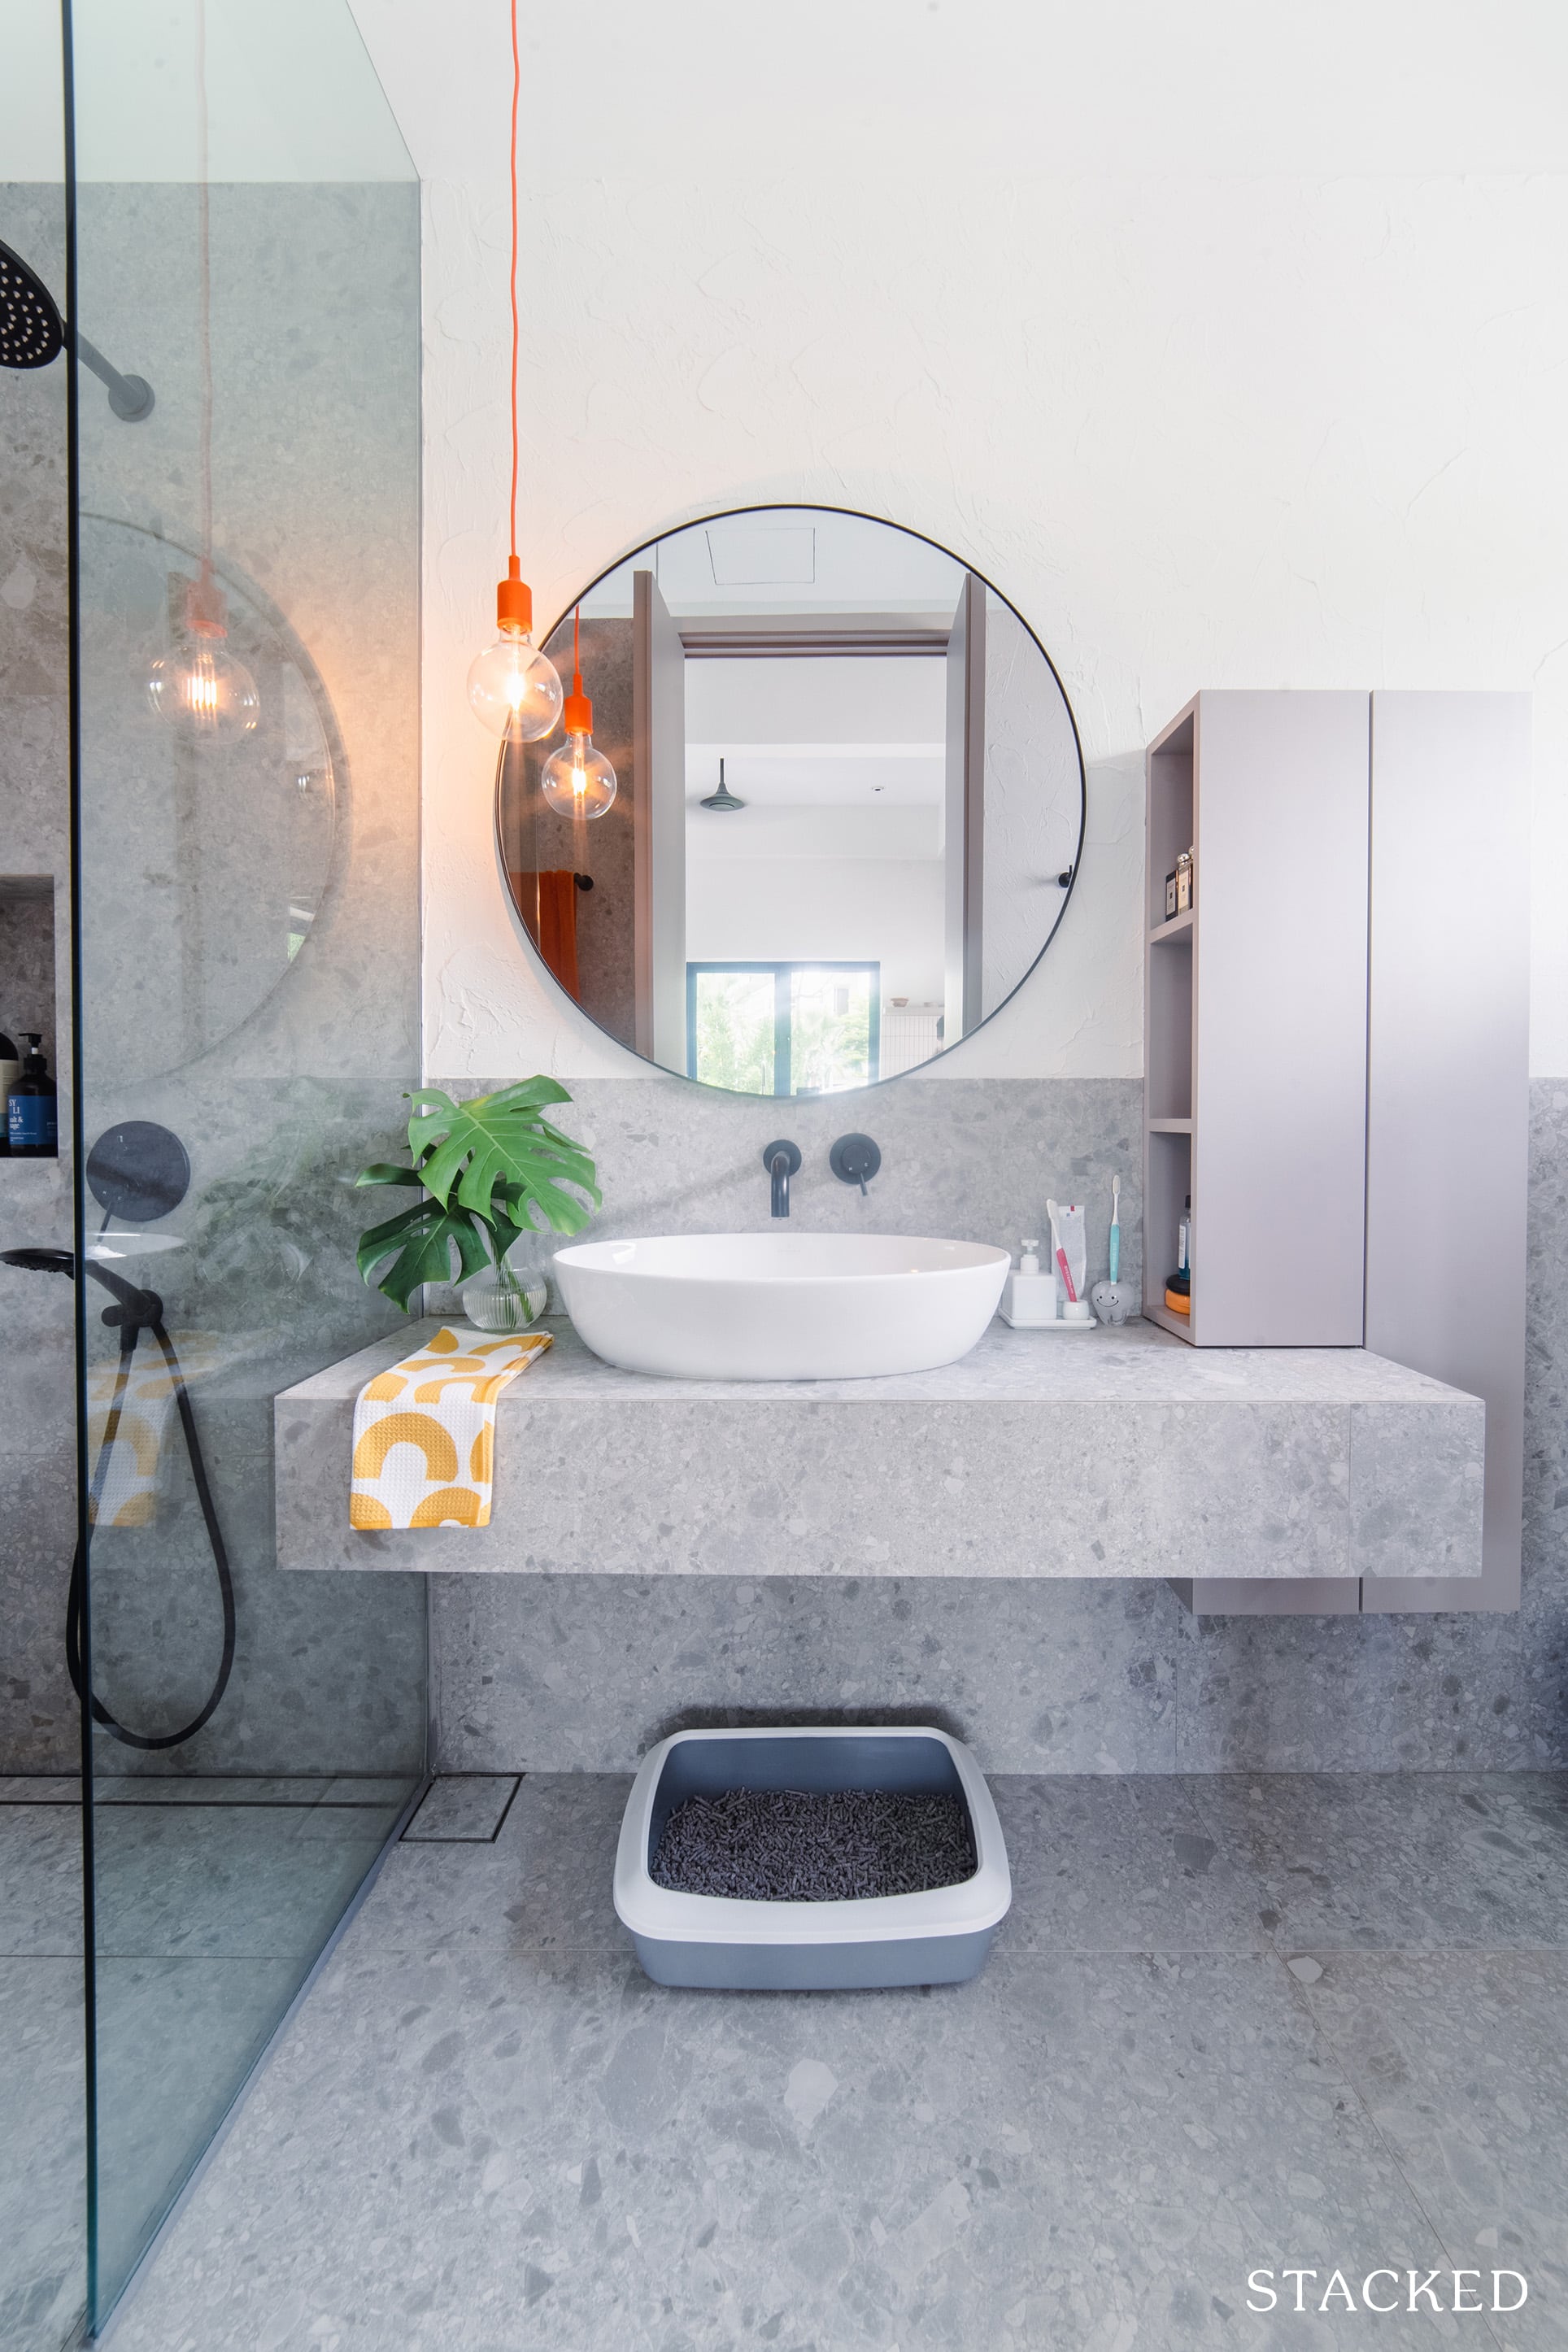
Bathroom
Michelle and her partner wanted to have two toilets, but were advised against it. This was because it could cause toilet chokage as they are restricted by the existing piping to their neighbour downstairs.
So instead, they merged the original WC and shower areas into a single toilet. They also requested to have the bathroom lengthened because she said the original area size was very tight.
Bringing The Vision To Reality
When we asked Michelle if the reno turned out to be what they were expecting, she answered that “the final outcome definitely comes close to what we had in mind.”
The renovation contractor who helped them achieve this was Ben Tay from Pantone 876.
“We went through a tender process with our designer and decided on Ben as he understood our needs and wants well,” she recalled. “He was also efficient and open-minded, and quoted us reasonably.” She added that Ben also has an aesthetic eye, given his past experience in running a designer lighting store.
The pair took their time sourcing for furniture as they wanted to have a good sense of their space first before committing to the pieces.
Most of their items are sourced from Carousell and vintage stores like Lorgan’s. The few items that were bought before their home was ready were their sofa set, dining set, and lighting. “Thanks to Carousell, we found many great deals which were highly affordable and in good-as-new condition.”
If Michelle had to pick the best area of their home, she said that would be their kitchen. “It turned out exactly as what we envisioned it to be and is a good playground for us to whip up meals for ourselves and our loved ones.”
Lessons Learned From A Succesful Reno Journey
The greatest challenge that the pair had to face happened midway through renovation. They discovered that the false ceiling boards might contain asbestos from the old floor plans. As a result, all work had to come to a halt for safety reasons, and they had to wait for the sample analysis results to come out.
“It also did not help that we learned about it a week before the Lunar New Year break,” she said. “As this was an issue that had to be properly handled and resolved, we could only wait patiently.” Then the good news came, and the couple was very thankful that there were no traces of asbestos contained in the false ceiling boards.
Last but not least, Michelle gives this advice to those who are planning to spruce up their homes.
“The process is going to be exciting, yet exhausting and may even be exasperating at times. However, just focus on the end result and all will be worth it. Do also make sure you have the next best option in mind, especially when it comes to material options, as you may face a lack of supply.”
Prostock-Studio / Getty Images/iStockphoto It takes a savvy home seller to negotiate top dollar for their home. That’s why GOBankingRates talked to the experts and compiled the 25 best tips on how to add value to your home before you put it on the market so you can get the […]
We use cookies on our website to give you the most relevant experience by remembering your preferences and repeat visits. By clicking “Accept”, you consent to the use of ALL the cookies.
This website uses cookies to improve your experience while you navigate through the website. Out of these cookies, the cookies that are categorized as necessary are stored on your browser as they are essential for the working of basic functionalities...
Necessary cookies are absolutely essential for the website to function properly. This category only includes cookies that ensures basic functionalities and security features of the website. These cookies do not store any personal information.
Any cookies that may not be particularly necessary for the website to function and is used specifically to collect user personal data via analytics, ads, other embedded contents are termed as non-necessary cookies. It is mandatory to procure user consent prior to running these cookies on your website.
Now let’s have a visual tour of their place and see how their home turned out:
 Now let’s have a visual tour of their place and see how their home turned out: